The finishing touches…
This weekend I’m working on wrapping this sacque up. It seems that setting sleeves are always the most challenging, at least for me.
This last week, I was just outside of Toronto in the city of Hamilton. It is where McMaster University is. The 11th FIB-SEM User meeting was held and I gave a talk on optimizing beam induced deposition in a plasma FIB.
Last night, Sarah and I realized we have just 2 more weeks until we take off for France! This is so on…
And so, this weekend is the final push. Let’s get ‘er done!!!
First up – getting the stomacher in place.
I am using hooks and eyes to attach the sacque to the stomacher. Practicality always wins and these seemed to be both practical and the least complicated. If you’ve been following, you know that I did not slash the back for eyelets. Not having done so has allowed me to fit the bodice just so and now with the hooks and eyes, I’m hoping the fit looks good.
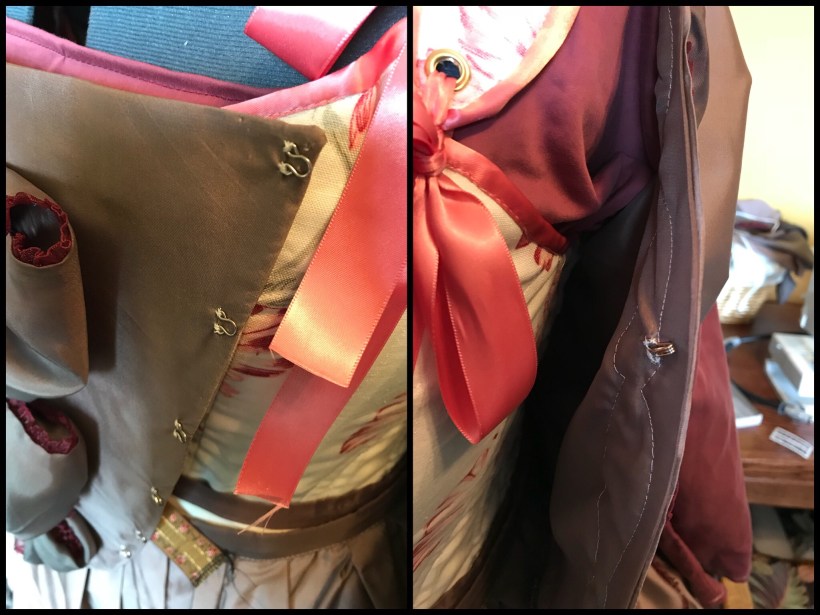
I did this fitting on the model
Next up – checking the hem of the sacque with shoes on. I’d like to leave the gown length so that it just skims the floor. When all was said and done, I had just under an inch for the hem. I’m going to press the easy button here too and use stitch witchery to finish the hem.
Sleeves and setting them
I ran a stitch up the length of the sleeve. On the sleeve pattern, there is marking for gathering up the top armscye, so I followed this.
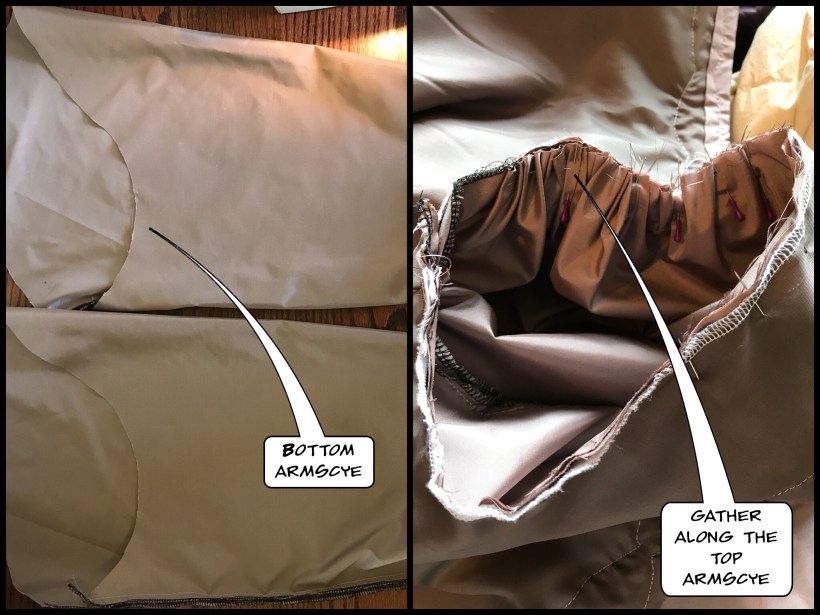
1. Run a basting stitch about a 1/4″ in from the seam to gather along the top of the armscye
2. Fit the diameter of the sleeve to the diameter of the bodice
3. Right sides together, pin and stitch the sleeve to the bodice. I chose to use a very long stitch so that after the fitting if the sleeve needed tweaking, I could easily remove the stitch and restart.
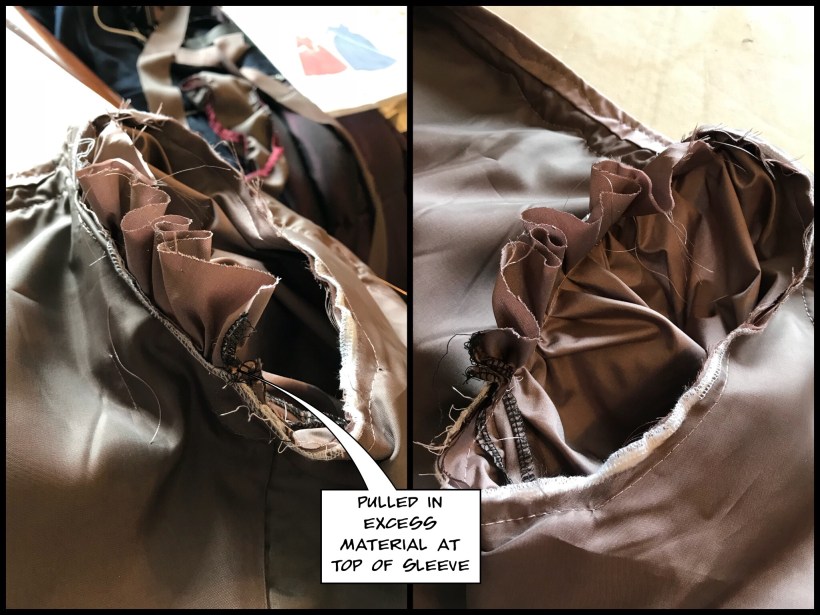
As it seems with these patterns, the fitting revealed a lot of excess fabric in the back shoulder portion of the sleeve (about 2.5 to 3 inches) where the sleeve was gathered.
I pulled out the sleeve re-gathered the sleeve in this area about 2.5 inches in from the seam and reset the sleeve.
The length of the sleeve was just right. It his the model right at the elbow.
Sleeve Ruffles
I’ve mentioned in previous posts that I didn’t get enough of the silk taffeta and have literally been running on fabric fumes.
I had to piece together several remnants of the silk in order to cut out the sleeve ruffles, but I did it.
I used the pattern shapes from Cox and Stowell’s The American Duchess Guide to 18th Century Dressmaking. If you haven’t purchased any 1″ square paper for pattern making, then you can easily make some, it just takes a little more time. I didn’t feel like running to the fabric store for it, so I just made some. The books calls for making a top and bottom sleeve ruffle. They are ever so slightly longer and wider to each other.

This is the one place, where I’ve chosen to use pinking shears as well. In Cox and Stowell’s book, they pink the crap out of their dress and in looks good. My plan was – use furbelows everywhere and pink the sleeve ruffles.

1. Cut out 2 of the bottom and top sleeve ruffles
2. Pink the edges if desired. (I picked up a pair of them off of amazon for about 12 dollars)
3. Wrong sides together, lay the bottom and top of the sleeve ruffles together and pin along the straight edge
4. Baste with machine or by hand, two running stitches next to the straight edge
5. Gather the sleeve ruffles by pulling on the basting stitches

6. Pin and stitch the sleeve ruffle to the end of the sleeve.

To finish off the ruffled sleeves I stitched on some furbelow trim around the outside of the top portion.

Lace flounces
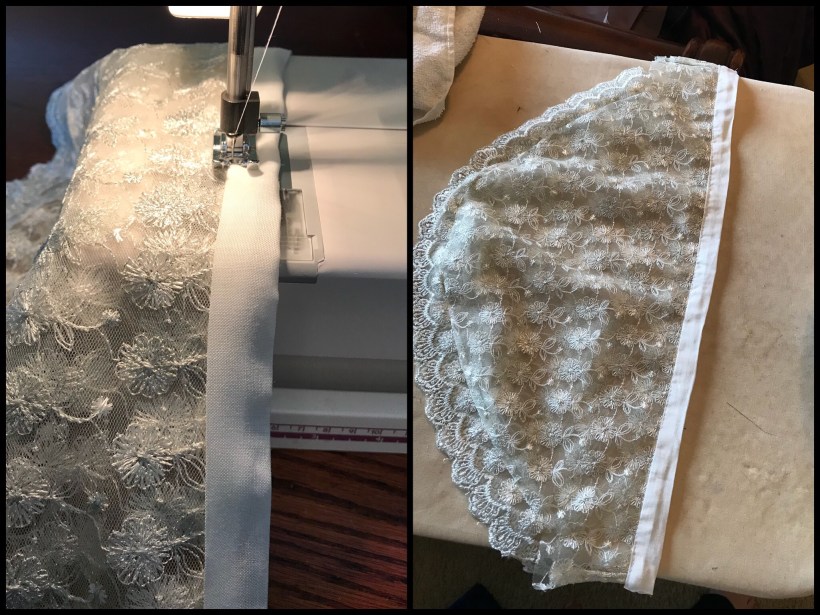
I found this great lace at one of the local fabric shops. It has. A really nice border.

I’ve chosen a 3-layered flounce to go on the ruffle. First, I cut away the border of the lace, so that I could reattach later. Using Cox & Stowell’s pattern, I cut out the flounces. Next, I pinned at stitched the lace border back to the flounces (shown below).

I used a long running stitch to attach all 3 layers along the straight edge.

After they were combined, I created some bias tape with fine linen and finished the straight edge.
Lastly, I basted a running stitch in the bias tape, gathered the flounce to fit the inside of the sleeve ruffles and whip stitched them into the inside.

Here is the final sleeve and sleeve ruffle. Sleeves are always a challenge for me. I need to find a class on setting sleeves and fitting the properly! Hah.

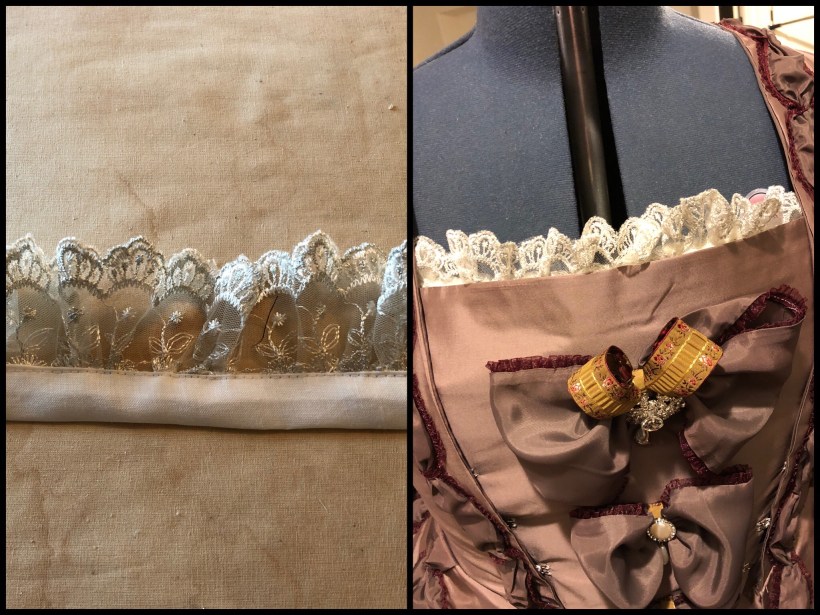
Lace Tucker
Measuring across the top of the stomacher, I cut out some of the lace I used for the flounces, attached to some bias tape and used some stitch witchery to attach to the stomacher.
One final fitting
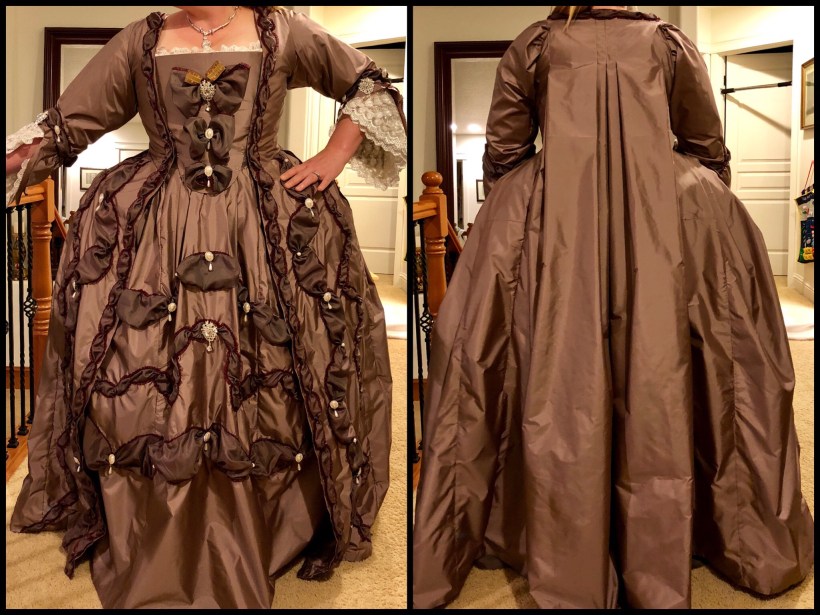
I’m pretty happy with how this sacque gown turned out. Especially for my first one! One area I’m just going to deal with on the day of Fêtes is where the stomacher meets the robe. I think I’ll just end up whip stitching it for the evening. The hooks and yes do a good job holding everything together, but you can just see them if you’re looking close.
The final touches have been added. I embellished the furbelows with rhinestones and pearls in the front. And then a few other additions. It seems like years and years ago, Joyce and I were shopping for beads, when we stumbled across these cameos. I’ve been meaning to do something special with them and what better than a large necklace of pearls with the cameos playing center stage.

We’re just about ready. In my next post, I’ll focus on sprucing up my watch chains with some new ribbons, discuss shoes for the occasion and even do some shoe modification.
Until then!
