OK – I know…I was supposed to make a hooped petticoat next, but what I’ve realized in doing some more research is that if I use the right boning in the pocket hoops, I won’t need anymore than just that. So, why isn’t my next post on the making the shift or the petticoat? Well, I’m waiting to get my hands on a dress form (preferably a used one) and in the meantime, I decided to make a hat. I think Sarah will look great with her own natural hair up underneath a fantastic hat! And…I’ve never made a hat before, so why not?
I’m very much inspired by Sofia Coppola’s Marie Antoinette and there is a beautiful tricorn hat that Kirsten Dunst wears when she is arriving on French soil to be presented to the King of France.

Yeah, that’s the one. Très chic et élégant!
What’s needed to construct a good looking ladies hat that will fit the theme?
1 yd buckram
1 yd quality felt
1 yd of chosen fashion fabric
2 ft 16 or 18 gauge wire
Needle/thread
Loads of pins
Notions and trim
Pattern construction:
Since this hat is going to see on top of the har and not fit over the head, it really wasn’t required to fit the cap portion of the hat to Sarah. So, I began with some basic sizes that I wanted the hat to be. Not so big that it looked like a pirate hat…
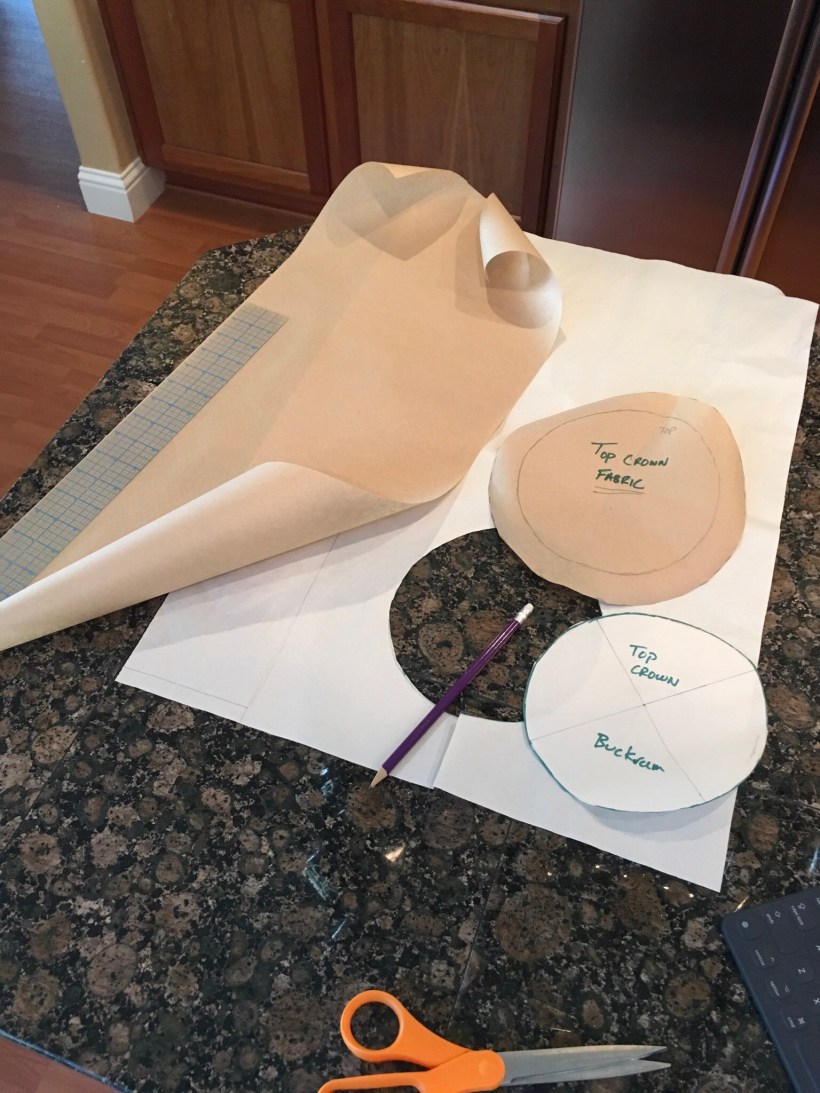
For the top crown, I made an circle/ellipse that was 6” in diameter in one direction and 7” in the other direction.
For the brim, I chose the same shape, but used 12” and 13” diameter respectively. I didn’t have a pattern for this, so I used large kitchen bowls and some freehand to get the right shape.
Also, for the sides of the cap, I cut out buckram that was 2.5” wide by about 25” long, knowing that the excess could be cut off.
Next up was the fashion fabric patterns. Here i added 2-3 inches in diameter for each of the pattern pieces.

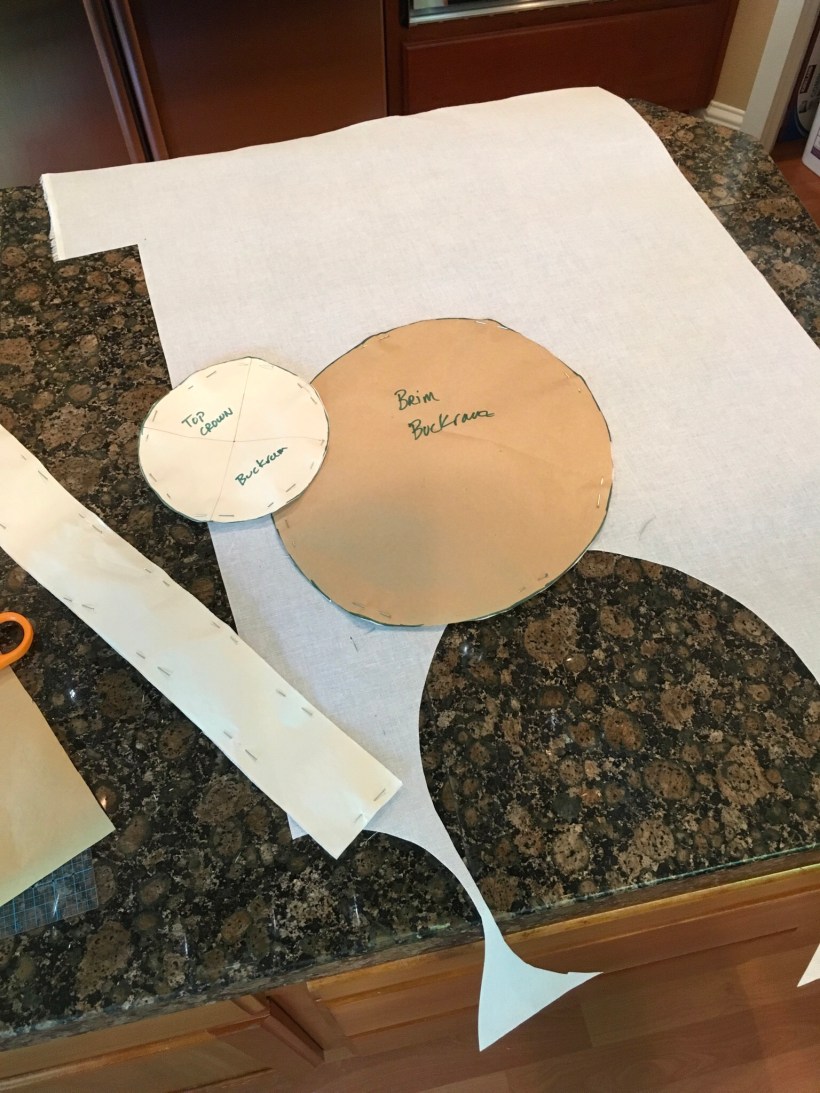
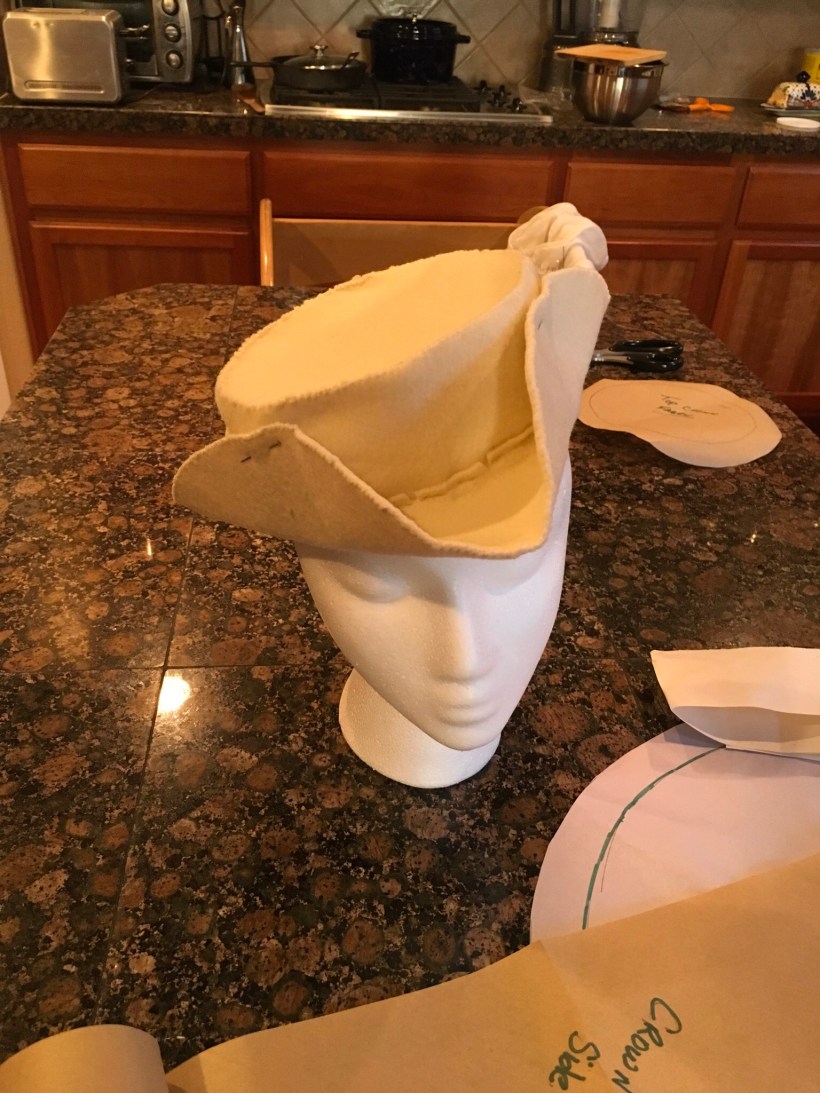
Once all of the pattern pieces were made, it was time to begin cutting the buckram for construction. With all of the pieces cut out, I decide that I would have much more control over this project if I just made the hat completely by hand. I did end up pulling the machine out, but that is much later in this project.
Good foundation: buckram!

First I attached the crown side to the top crown using a simple whip stitch.
After this part of the construction is complete, it is time to attach the wire to the bottom of the cap. Working with wire and fabric (even buckram) can be somewhat challenging, so patience is key. Using a button hole stitch, I attached the wire.

Before attaching the brim to the crown cap, I first cut out a circle from the middle about 5.5” in diameter. Then, using the shears, I opened up the circle so that it would fit over the crown.
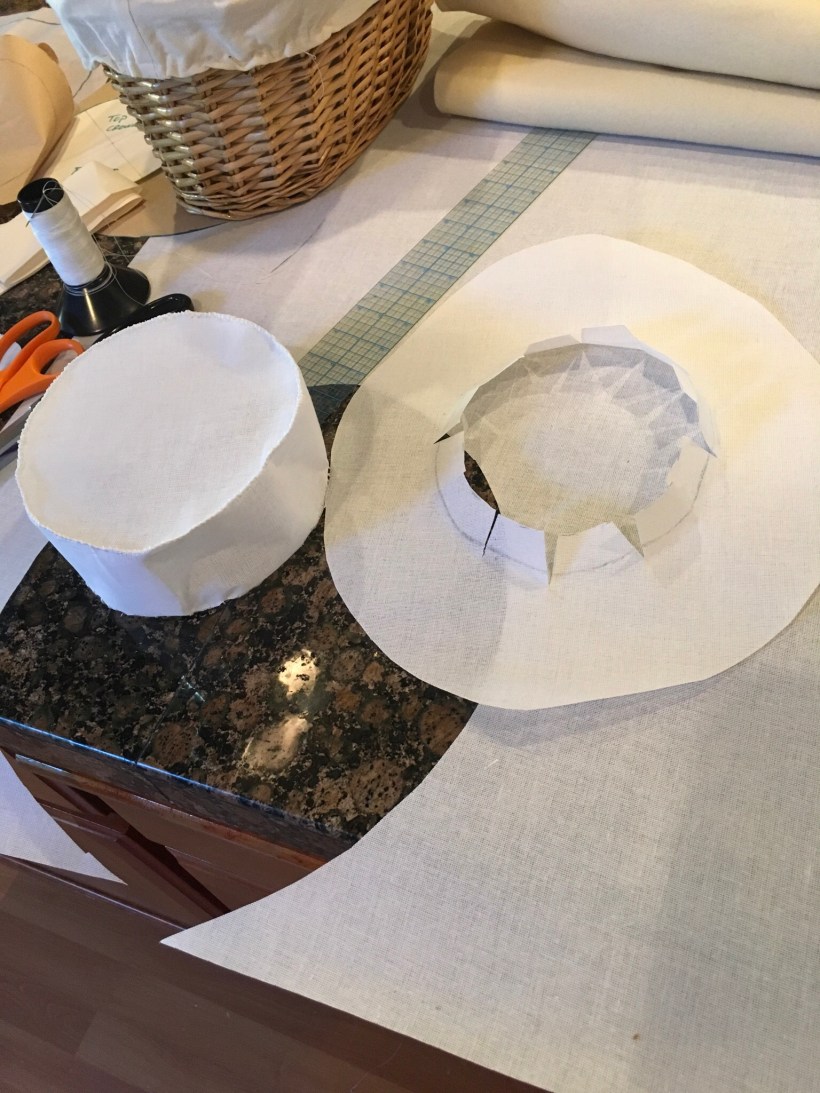
Once the opening was large enough, but not too large, the brim can be placed over the top fo the crown and lowered into place.

Here is the buckram form after hand stitching into place.

Using the buckram pattern pieces, identical pieces in felt were cut and and stitched into place over the buckram.

This is what the hat looks like after the felt has been stitch into place around the crown.
Et voila! Here is the hat in its state prior to place the fashion fabric onto it.
At this point, it is just a matter of retracing the steps that were used to place the felt over the buckram. I paid attention to what portions of the hat were easily seen and made sure to stitch those in place first.
OK – with the foundation of the hat in place, it is time to start cutting out fabric and hand stitching it into place. I should point out that making the hat by hand is preferable to torturing the hat on the sewing machine. I can only imagine what it might have looked like…

I’m trying to find something witty to say here, but at some point, one just needs to bust out the patterns and get to work!
Motivation plays a key role in keeping the momentum.

So after a lot of work, the hat was finally covered in fabric. Now the exciting part begins to happen! EMBELLISHMENT! This word was enough to make a trip to the Hillsboro JoAnn fabric store exciting and that is really saying something. Especially the one on T.V. Highway. I really wanted to hit the Mill End store for trims, but honestly, traffic in Portland is paralyzing and I couldn’t stand a life draining car ride across town.

I purchased this ribbon in June on my fabric hunting trip in Vancouver, B.C. Love it. It has tiny little roses embroidered on the edges. Also, you see the appearance of Sauron, my styrofoam head. I imagine why he chose to become an all seeing eye and it’s because his real face was just a generic mannequin face. Hah!
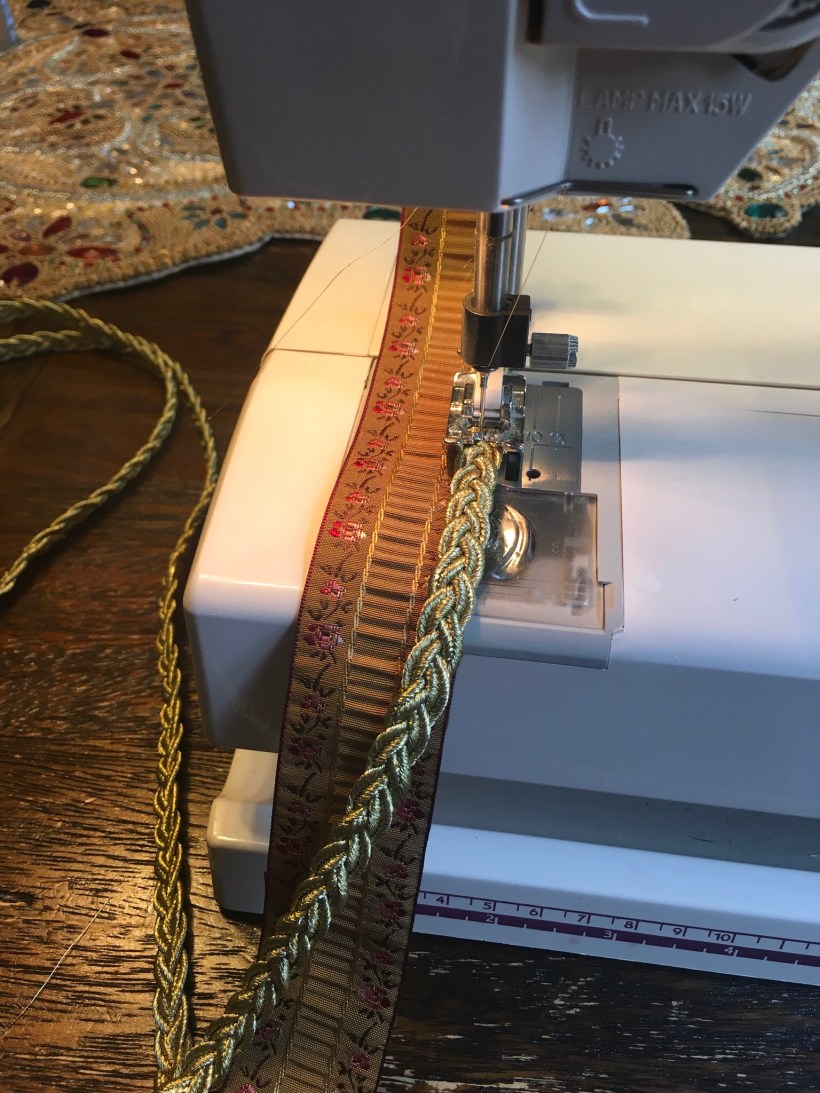
Here’s where the machine came out. I started hand stitching this and I was thinking, is it worth it to get my butt up and go pull the machine out for a couple of yards of trim, but I thought about you, the reader, all 2 of you and thought you might like to see some variation! And so, the Viking 230 makes an appearance for the hat. Note the roses on the trim!!!

Things are really starting to come together with the hat. For trims, I purchased some burgundy satin ribbon, gold trim, some feathers. I pulled in some of the stretch ruffle trim that will be used for the furbelows on the dress.

And here it is! Sauron models a tricorn hat that will match the robe de la Française and consumed about 20-25 hours of time. Except for using the machine to sew trims together, the hat was made entirely by hand and actually was a lot of fun!
Until next time!!!
