Keeping up with the momentum, it is time to finish the first pair of breeches.
First however, let’s talk Macaron! A couple of years back, my best friend, Joyce, gifted me with a beautiful coffee table book on Macarons. There is something beautiful about those pastel colored disks. Sometimes, you bite into one and it’s scrumptious! Other times, you say, “WTF!” Finding them after the holidays in a Home Goods food section is actually scary. There is a great little shop in Portland, named La Provence, and they make some fabulous macarons! So, last week, Rhys, my youngest, and I decided to tackle the making of macaron. One thing I’ve learned over the years is this: rarely are the good things in life achievable in one go. That being said, we decided to make 3 batches of varying flavors.
1. Vanilla with a vanilla custard – Rhys’ favorite sweet flavor is vanilla, at least at this moment.
2. Pistachio – because I love it
3. Salted caramel
After an afternoon of dlilgence, here’s where we ended up! And they were good!

Now back to those breeches…
Adding the button holes
The maker of the patterns would have you make these buttonholes by hand and you have must utmost respect if you take it on. I simply do not have the patience or the time right now to consider such an endeavor. And so, buttonholes were made on my Husqvarna. Counting the number of buttonholes required for the breeches.
Leg seams = 8 (4 for each leg)
Kneeband = 4 (2 for each band)
Fly = 4
Waistband = 3 or 4
Fall front – 2 (one for each side)
Total = 22!
OK – now for placement. For the waistband, I chose 4 button holes and they are placed 1/2″ in from the center
1. Hand baste the location of each button, horizontally on the waistband
2. Hand baste where you would like the beginning and ending buttonbars to be located vertically (see picture below)
3. Prepare the buttonhole however you choose. There are many YouTube videos showcasing how to make buttonholes and often times, if you plan to use your sewing machine, the instruction booklet will have a detailed section for making a buttonhole.
4. Once the holes are made, use a seam ripper or small pair of scissors to open the buttonhole up.
If you have been following the blog, then you know I selected a gold tone metal button with some nice detailing reminiscent of the period. If you haven’t read the post it is here.

I used a 15 mm (0.6″) button for the breeches in all locations.
Attachment of the fly
1. Turn breeches inside out and pin the top left front leg down 1/2″ (seam allowance) from front pocket to center.

2. Either hand stitch or machine stitch this into place
3. Fold under seam allowance on left front leg center (this will be where fly is attached)
4. Pin fly into place, adjusting the position to your preference, such that the selvedge is next to the seam allowance
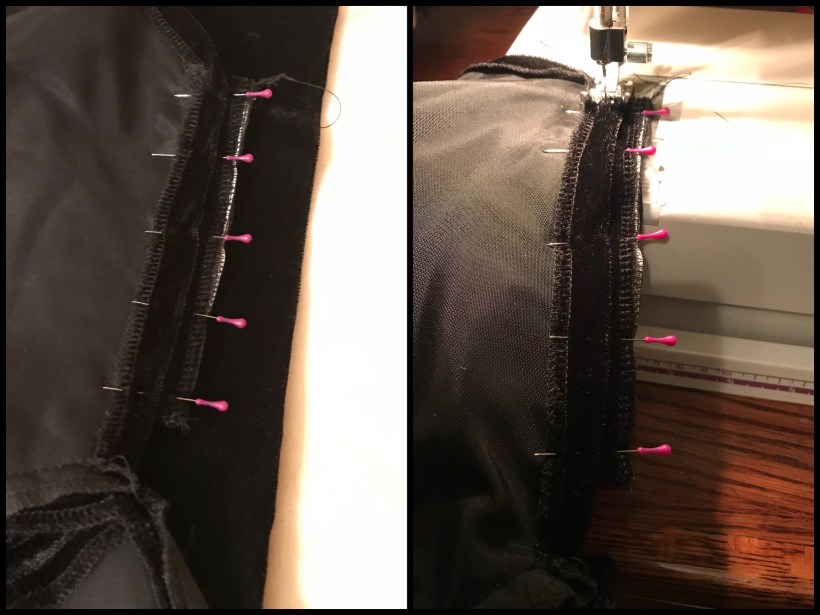
5. Stitch down
6. Baste in locations for buttonholes

7. Put in buttonholes

8. Fold the fly under the left leg front and stitch into place. If this part of the construction give you a headache, take a few minutes to watch some videos on YouTube about adding a fly into pants.
9. Add buttons to the corresponding locations on the right leg front center as well as buttons for the corners of the fall front

Kneeband construction
Depending on the type of fabric you have chosen for the garment, you may need to use interlining or fusible interfacing. In the case of velvet, I definitely recommend interfacing for any portion of the garment that will be pulled on (waistband and kneebands). In cutting the fabric for the kneeband, I added a few inches on to the wide end of the band. This allowed me to customize the size of the band on the fly as I was attaching to the leg portion of the garment.
1. Interline the kneebands and finish edges as you choose.
2. After fitting the leg diameteter the leg portion of the garment, it may still be necessary to gather the back portion of the leg in order to fit the kneeband correctly (it really depends on the look you are trying to achieve). If you want no gather in the back of the leg, then lengthen the kneeband (discussed above). If you want some gathering in the back of the leg, then use the patterned length for your size.
3. If gathering, hand baste 1/4″ in from the bottom of the leg in the back from side seam to the inner seam.
4. Gather the back portion of the leg as desired, making sure not to include the narrow portion of the kneeband in your measurement and also folding in the seam allowance on the opening of the side seam of the leg.
5. Pin the knee band to the back portion of the leg, right sides together. Stitch as shown below.
6. Fold over hem allowance on other side of the knee band and hand stitch the band to the inside of the leg opening.
7. Try breeches on to ensure a successful fit.
Finishing the garment
Any number of finishes can be employed to make the breeches more ornate. For this black velvet pair, I stuck with the simplicity of the buttons.
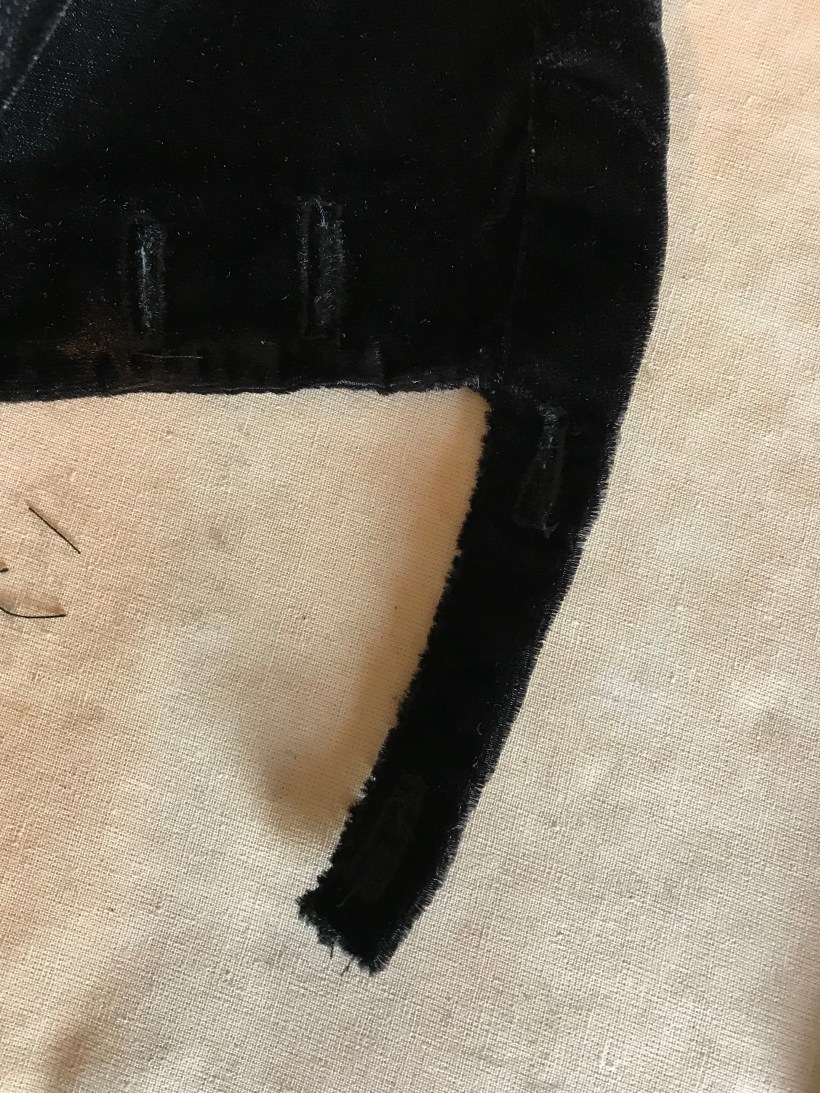
The side leg openings, where buttons will be place can be finished in a few ways. I will note 2 ways below.
Simple and straight forward
1. Finish the side leg openings by hand stitching the seam allowances closed with a blind stitch
2. Add buttonholes to front side leg seam allowance
3. Add buttons in corresponding locations on the back side leg seam allowance
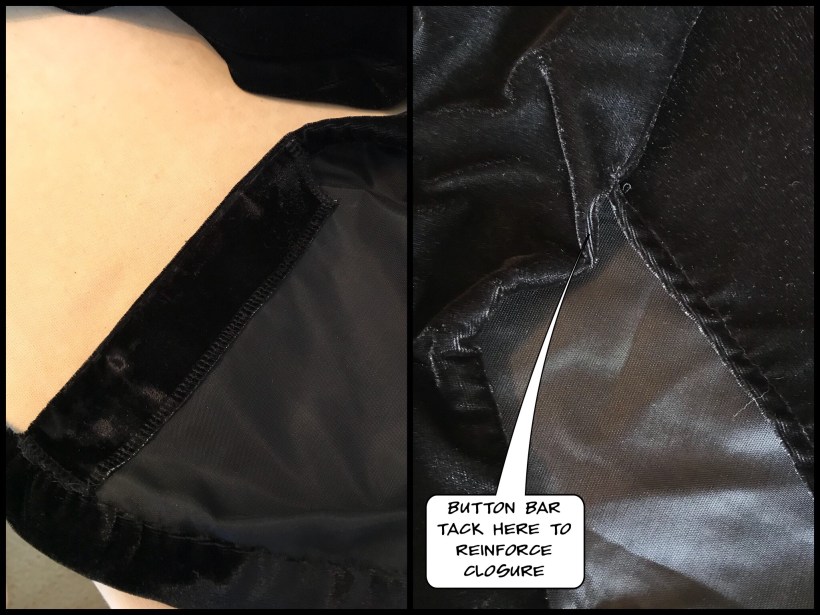
Slightly more complex, but nicer finish – making a placket
1. Using the facing pattern (with a longer lengthwise cut to the leg opening size) cut 2X rectangles of outside fabric.
2. Interline or interface the wrong side of the rectangles

3. Finish edges as desired
4. Pin the plackets onto the front side seam of each leg

5. Stitch placket into place, fold inside and press as required
6. Hand stitch placket to inside of leg and use a button bar tack to reinforce side seam at top of opening
7. Baste in locations for buttons holes (as in previous) and sew in buttonholes

7. Place buttons in corresponding locations
8. Add buttonholes and buttons to kneeband as desired
OK. So here’s what they look like finished. I’m pretty happy with the end result. I feel that I can now take on the final pair of breeches, which I think are going to look amazing!
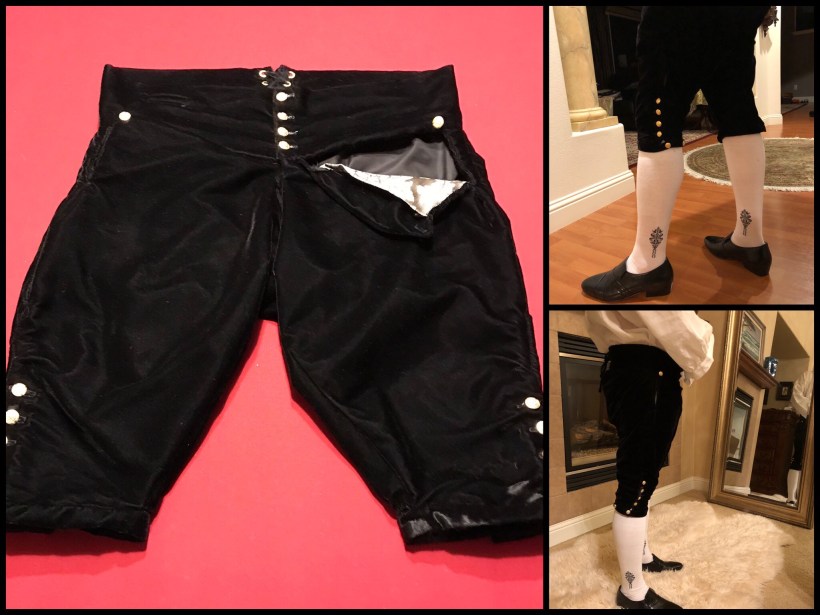
Some final remarks on fitting these breeches
I found that even on this pair of black velvet breeches, the fitting of the legs to get an authentic look required some additional fussing with. Each person’s legs are a little different, so make sure to continue to fit as the breeches come along.
Another area that was frustrating was the center front fly area. I found the instructions were insufficient to get these right and spent a few times trying to get it right. The fall front slight sags in the center and if you’re not wearing black underwear, I felt that would be under fabric showing. In the end, I chose to hand stitch the tops of the fall front (near the center) to the waistband. I tried hooks and eyes, but that looked worse that just stitching is shut.
