And the countdown to the Fêtes continues.
T minus 29 days!
A lot has happened with the sacque since my last post. Feeling the crunch ever so slightly, rather than giving any time to my posts, I decided to spend it on the garments knowing I’d be travelling soon and could dedicate some quality airplane time to writing!

This week, I’m on my way to Toronto, ON in Canada. The 11th annual North American FIB-SEM meeting is occurring at McMaster University and I will give a talk and run their new plasma focused ion beam during the meeting.

Bodice
After completing the sloper for the sacque gown, I felt pretty confident in the fitting of the bodice. That being said, I wanted to confirm on the model!
I chose to interline the bodice with a fine-woven, white cotton because both the lining and fashion fabric were delicate.
I’m using a modified construction method, blending techniques from Reconstructing History and supplementing with my copy of The American Duchess Guide to 18th Century Dressmaking by Cox and Stowell.
I cut out the bodice from all three fabrics and then used the interlining to fit the model.

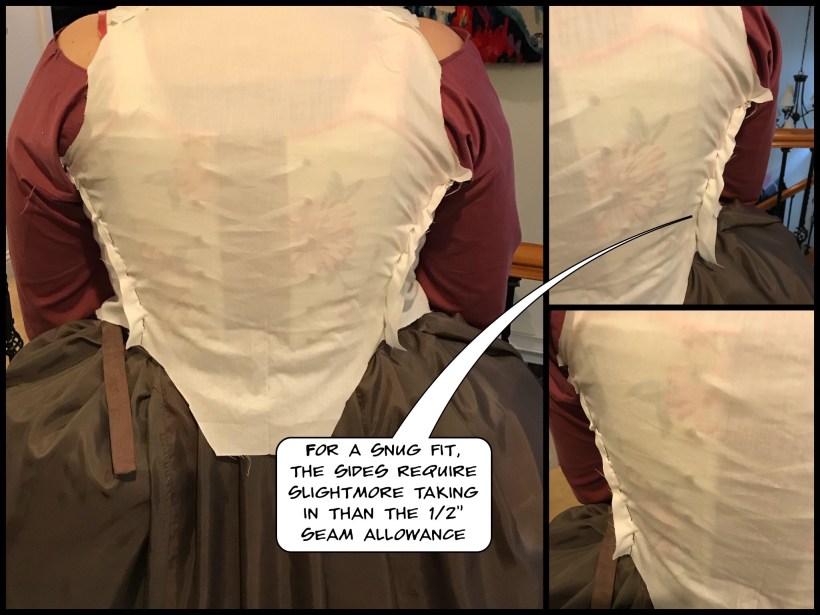
After fitting to model and leaving the pins in place, I transfer to the dress form to make sure I could use it for the rest of the fitting/forming.

Good to go!
1. Mark and trim the bodice fashion fabric to the correct fit, using your lining or interlining. The directions from both of the references I’m using stress not, to use a muslin at this step. If you use a different fabric, it can pull differently on the model/dress form and and then when you cut the final fabric and fit, there could be large differences

2. Baste the interlining to the lining. I also overlocked the seams together so that they would act like one piece of fabric
3. Pin and stitch the side seams and the tops of the back bodice to the front bodice (right sides together)
4. Refit onto model/dress form to ensure fit is good

5. Repeat #3 for the fashion fabric
7. Right sides together, pin and stitch the fashion fabric to the lining around the the front seams and around the neckline
8. Turn out and press
9. At the top shoulder seams and side seams baste the fashion fabric to the lining (wrong sides together)
10. Put bodice aside for now
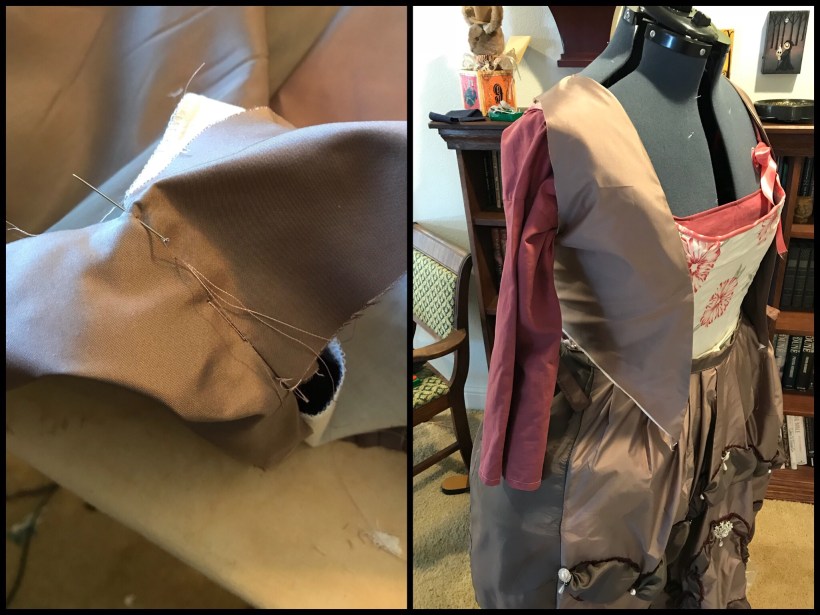
Sacque Back
For this part of the gown, I found that both references directions were pretty similar, so I went ahead and cut the back out from Reconstructing History, but followed the books instructions (because frankly, they were a lot better).
The back is composed of about 60 – 80 inch wide fabric to allow for lots of pleating.
I chose to go for the 80 inches of fabric to get a true voluminous feel to the back. Now is when those measurements form Part 1 are going to come in handy. The back and front skirt length measurements will come from the waist to floor and shoulder back to floor measurements that were taking with the underpinnings on and in place.
11. Using a large flat surface or the floor, lay the back flat and mark the center of the back
12. Working from the center out, follow the instructions making large box pleats. Be sure to pin each of them not only at the top, but about 5-7 inches down the back to ensure they are straight and uniform. I found that using a clear, fabric ruler worked well for straight pleats when placed on its edge


13. Pin the sacque back onto the model/dress form to ensure it fits across the back nicely. The back should extend across the entire back. Make sure the pleats look uniform and to your liking. The instructions from Cox and Stowell discuss adding a hidden pleat on the sides of the back and how key this is in the back laying properly. Please pay attention to this remark
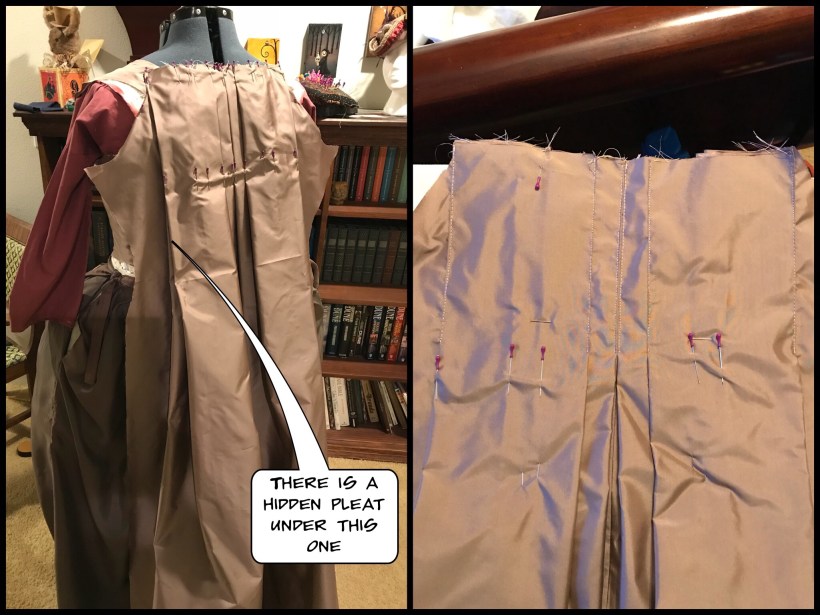
14. Stitch the pleats into place as show below. Turn the back over and hand baste the remaining pleats into place


15. Finish the top of the back to keep it from fraying and put aside for now
I took a piece of fashion fabric that was the width of the top of the back and about 2 inches wide and stitched over the top to finish the edge.

Front skirts
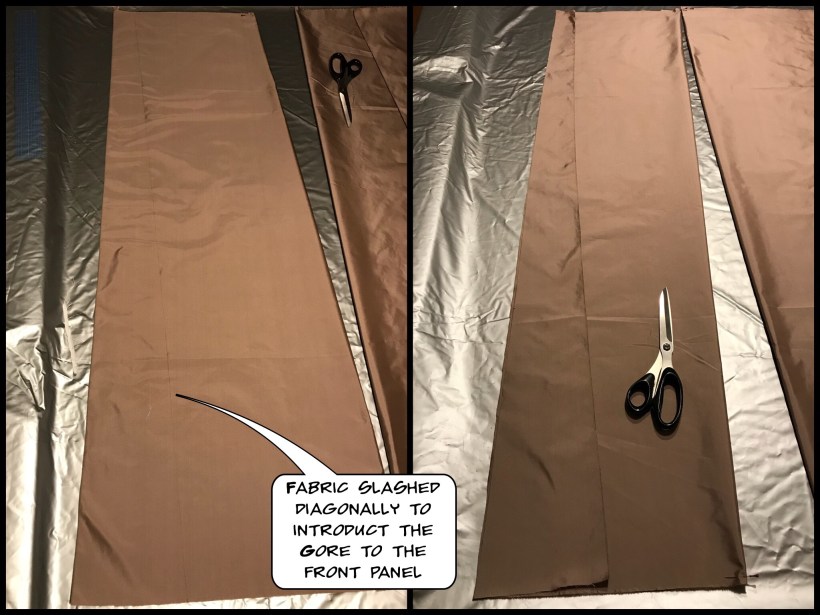
I really liked how Cox and Stowell explained making the front skirts and had a great trick from making the most of your fabric by making a gore out of a panel. Since I knew my fashion fabric supply was tight, I chose to go with this method rather than Reconstructing History’s method.
You will need 4 20 inch wide panels cut using the measurement collected for the side waist to floor (make sure the pocket panniers were on when this measurement was collected).
Two of the panels will be used for the back port of the front skirts and two will be used for the front facing portion of the gown. Follow the instructions for making the gore out of the two front panels. I’m not going to detail the instructions here because I think what the authors did is clever and they deserve proper credit and royalties for their resourcefulness. Please refer to their book.
Furbelows and frills (some say optional, but really?)
Let’s face it, I’m making these garments so that my wife and I can attend Fêtes Galantes. THIS IS NOT THE TIME TO HOLD BACK! Too much just doesn’t fit in the vocabulary here.
So that in mind, I needed to stop with the construction of the gown and start making furbelows. If I count the time it took for me to make and place the furbelows on the petticoat, I think I counted 38 hours of furbelows making and placement! Or 6 nights burning the candle after working all day! The great thing about the process was that it was mostly mindless and so I could just rock out to music and pound away on the sewing machines.
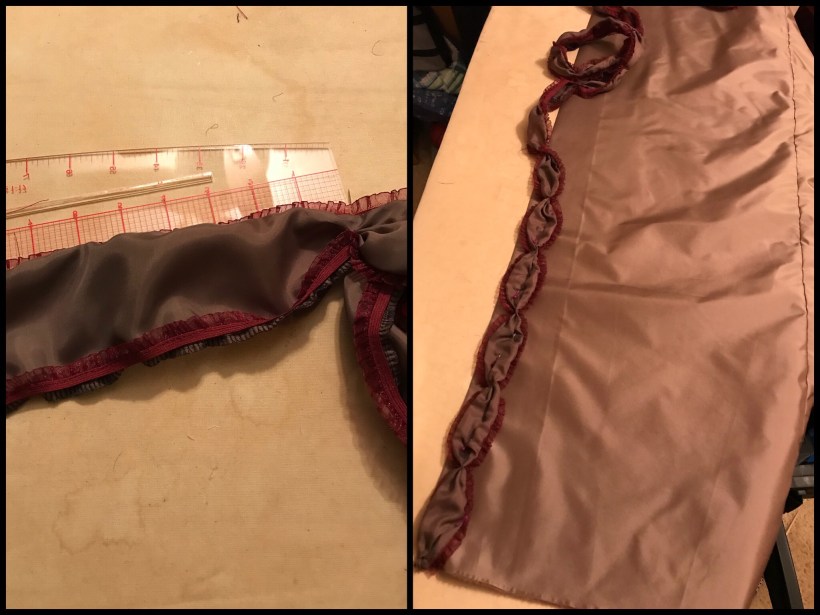
For the furbelows, I chose to use the lining fabric primarily because I was running on “fashion fabric vapor” and knew I would NOT have enough of the silk to get them all done. In hindsight, I really like the contrast the lining gives on the robe. I selected a 3/8 inch burgundy elastic trim and I think it looks fancy and pretty!
I used two widths of furbelows to give a dramatic effect. A narrow strip ~ 2.5 inches and a wider one that was about 5 inches wide.
To construct the furbelows, cut long strips of the desired fabric, finish the edges (I used the serger in this case) and then sew the trim onto the edges.

After the all of the furbelows were made, it was time to start placing them onto the front skirts. First, I ran a strip of trim along the front edge. For the next portion of furbelows placement, I laid the skirts down onto a flat surface and and pinned them into place the way I liked the look.
Actually – I saw Starlight Masquerade’s Robe and I just thought it was so elegant that I had to do something very similar.

After the furbelows were attached to the front skirts, it was time to get back to the construction.
Piecing the robe together
16. Right sides together, pin and stitch the front panels to the back panels of the front skirts
17. Press seams
18. Pin and stitch the front skirt panels to the side seams of the back of the gown
19. Press seams
20. Pin the back and front skirts to the model/dress form
– start at the center back
– pin the front edges of the skirts to the front of the bodice
– the front skirts have a pocket opening in the gored front panel. Place this a couple of inches behind the opening in the petticoat and pin into place
– from the waist up, fold over the back side seam (below) from the waist up and pin into place on the side seam of the bodice
– use a hidden stitch and stitch the side seams together
– from the pocket opening through the back of the front skirt panels, the remainder of the fabric will need to be pleated to fit the bodice dimensions (I basted everything into place to ensure a proper fit, checked and then moved forward.
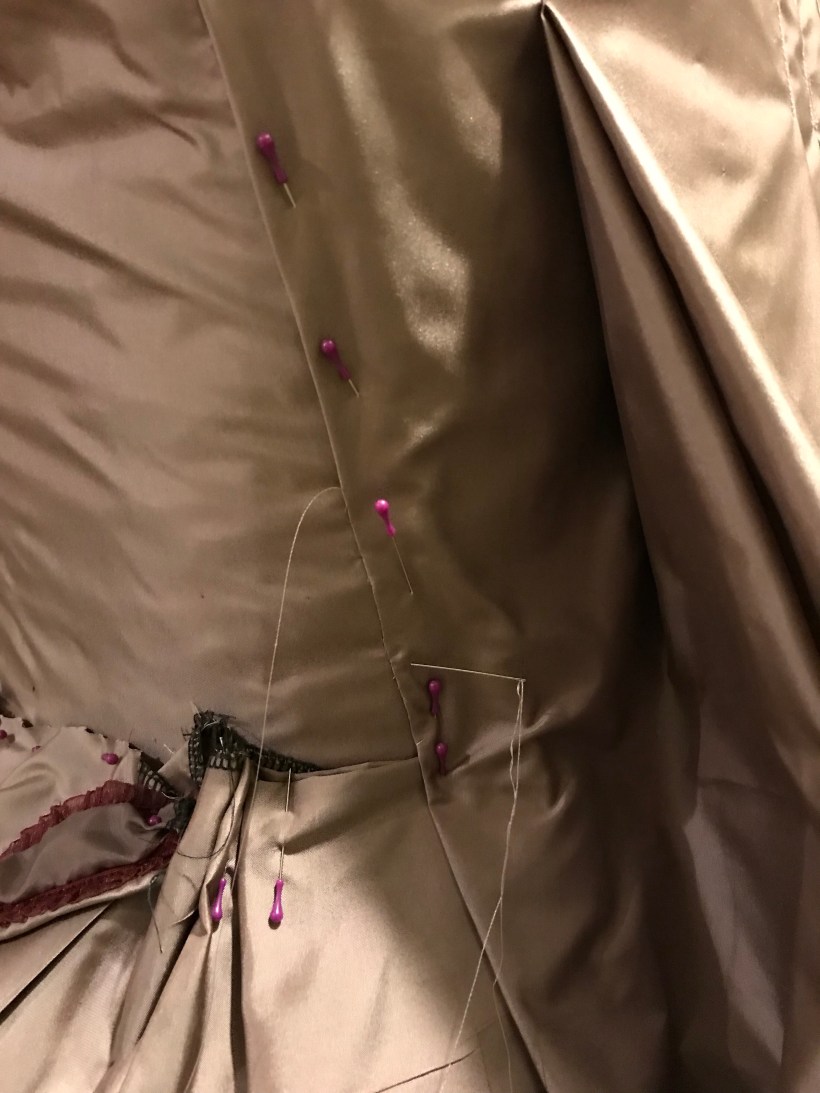
21. With the back portion of the skirts pleated and fit into place, you will now pin the rest of the front skirt in place and fit it along the bottom of the bodice as shown below.

Make sure before you cut off the excess portion of the front skirts, that a seam allowance is added to sew the front skirts to the bodice. In the image above, you can start to see the robe form as I’ve pined it to the stomacher to make sure the fit is right.
22. Remove the excess material from the front skirts
23. Unpin the skirts and back from the dress form
24 Right sides together pin and stitch the skirts to the bodice

25. Place the sacque back on the dress form or model and pin the furbelows along the front edge of the bodice and up around the neck
26. Sew into place

Wow – it’s really starting to look like a robe a la française!
Next post will focus on making the sleeves, setting them and putting the finishing touches on!!!!
Until then!
