Slopin’ it up
Monday A.M. – jetting to Boston for a week on the east coast. Mini lectures at Harvard, Yale, Brookhaven National Labs and a quick meeting at M.I.T. One – I’m a pretty loyal Delta traveler, but Alaska’s non-stop flight had me at not having to get up at 4AM for a long day of travel. However, I just might rethink this one in the future. Even though I’m in the comfort portion of the plane, Alaska’s middle seats really are criminal…and I’m just an average sized guy! Ugh, such is the life of frequent travel.
This last week’s home spare time was spent getting my mind around the sacque gown a.k.a Robe a la française, coming to grips with the fact that I didn’t get enough silk for Sarah’s sacque (and frantically trying to scour the web for more of the same color!), ordering trim for my frock and waist coats and trying out a new peer-to-peer selling site, called Mercari. Mercari – bottom line. A good app, but still at the mercy of normal people buying and selling stuff. Since most of these folks are not in it for a business, they have no real motivation to ship items on time, to even be responsive or to just review the seller (which is required to release the funds to the seller, once a buyer receives).
Embellishments!
While surfing Etsy, I found this online seller called “shopofembellishments” out of India. Amazing embroidered trims, patches and ribbons in all sorts of widths and colors. I settled on the trims below for the coats. I think these will work out nicely.

So, I ordered up the yardage I needed on Monday. And, not joking, the trim travelled from India and reach me on Wednesday! Now that is some stellar shipping.
Getting started with the sacque
Sarah found a giant piece of fabric in a butter yellow (seemed to be a table cloth for a very long table) for $5 at a local thrift store. It must be sacrificed to the garment construction gods…This post will focus really on the highlights of the practice run. I will spend more times on the details with the real fabric in the next post.
I began by pulling out the patterns from Reconstructing History and supplementing with my copy of The American Duchess Guide to 18th Century Dressmaking by Cox and Stowell. I knew, I’d have to pretend drape to get the fit right, but started with cut outs from the Reconstructing History patterns to feel a little more at ease.
I also remeasured my model and adjusted the dress form to match as closely as possible the waist and bust lines. Next, I whipped out the petticoat in the practice fabric to ensure the length of the bodice was right.


After all of the pieces were cut out, it was time to start pinning them onto the dress form and fitting. Both the book and the pattern instructions called for fitting the bodice tightly over the stays, so that is what I did.
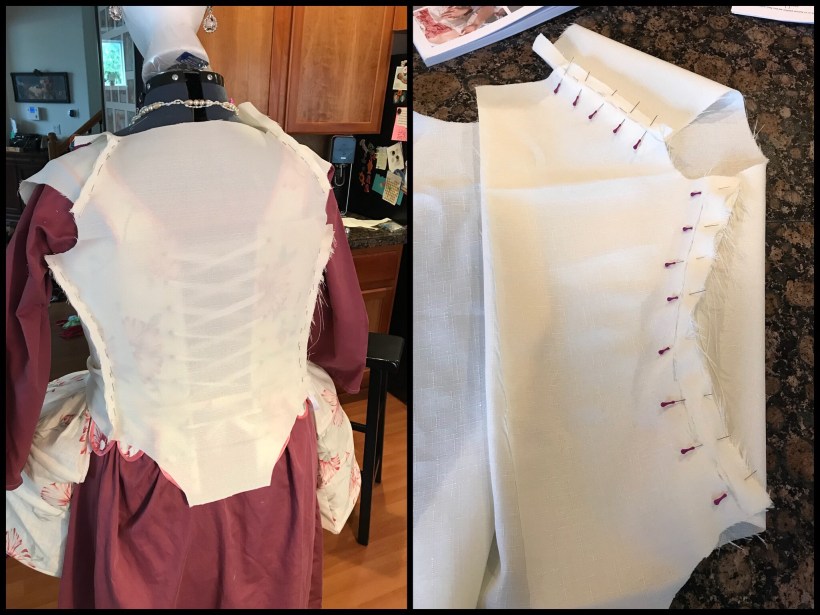
After the bodice was fitted to the dress form, I slashed the back up the middle, reinforced the open area with some coutil and added a few grommets. This first set of bodice pieces will be used at the lining.

The fitted pieces were used to modify the patterns and I recut the same fabric for the top fashion fabric. This cheap tablecloth fabric frays really easy, so I had to overlock all raw edges before pinning the top onto the lining. So, here’s where I left it before taking off for the week. On the back, I am thinking I will run some boning in the middle of the back because its gathering up at the bottom. Perhaps when the skirts are added to the bodice it will flatten out. Also, I need to set the sleeves and see what fitting needs to be done there. I think I’m probably a day’s work away from starting on the final sacque.

Until next time!
