Greetings! Another week passes with business travel and continued progress on our garments for the pending Fetes! Last week, I spent on the east coast visiting MIT, Harvard University, Yale University and Brookhaven National Labs. Spring hasn’t quite sprung on the east coast and snow still lies on the ground still. We started off in Boston, visiting Harvard and MIT.

Then is was off to Brookhaven via ferry and automobile. Normally, I would avoid any water moving vehicle because I get extreme motion sickness, but the trip was a short 80 minutes and I did pretty well; well enough, in fact, to get a little work done on the ferry!

Last on the tour was Yale. Yale is definitely one of my favorite Ivy League’s to visit. The old campus feels like something out of Harry Potter and one could get lost wandering through the outdoor hallways and gates.

Picking up where I left off with the sloper, it was time to attach the outer fabric to the lining and then add the skirts to the bodice.
As I mentioned, I will do a more thorough job of detailing the construction of the sacque with the real fabric. I attached the skirts to the bodice, checked on the model for proper fit.

And…attached the back part of the gown, set a sleeve into the bodice and checked the fit.

Feeling like I had a good first start on the garment, I set out to start with the real fabric and keep my fingers crossed!
Petticoat Construction Details
Make sure that you take accurate measurements of the model with the underpinnings on.
Measure:
1. Waist to floor for:
a. Side over pocket panniers to the floor
b. Front to the floor
c. Back to the floor
For the sacque, I used a modified construction method, blending techniques from Reconstructing History and supplementing with my copy of The American Duchess Guide to 18th Century Dressmaking by Cox and Stowell.
For the petticoat, I preferred Cox and Stowell’s method.
In their garment construction techniques, they instruct to make the petticoat out of 6 20″ panels. If you have 60-inch wide fabric, I suppose you can just use that as well, but according to the authors, the gown will look more authentic with narrower cut panels. I chose a silk taffeta that is 45 inches, so for me the 20-inch wide panel works fine.
1. Cut 6 panels 20-inch wide to the length measure for waist to floor on the side
Now – as you may have read from the previous post, I didn’t end up getting enough of the silk taffeta to finish the whole sacque, so I’m using the lining material where I can to make up for the deficiency. I’m also using the lining to make the furbelows.
In my case, I used the lining for the back 3 panels and then also some of the side front panels (what won’t be seen).
2. Sew 3 of the panels together and do the same for the other 3 panels
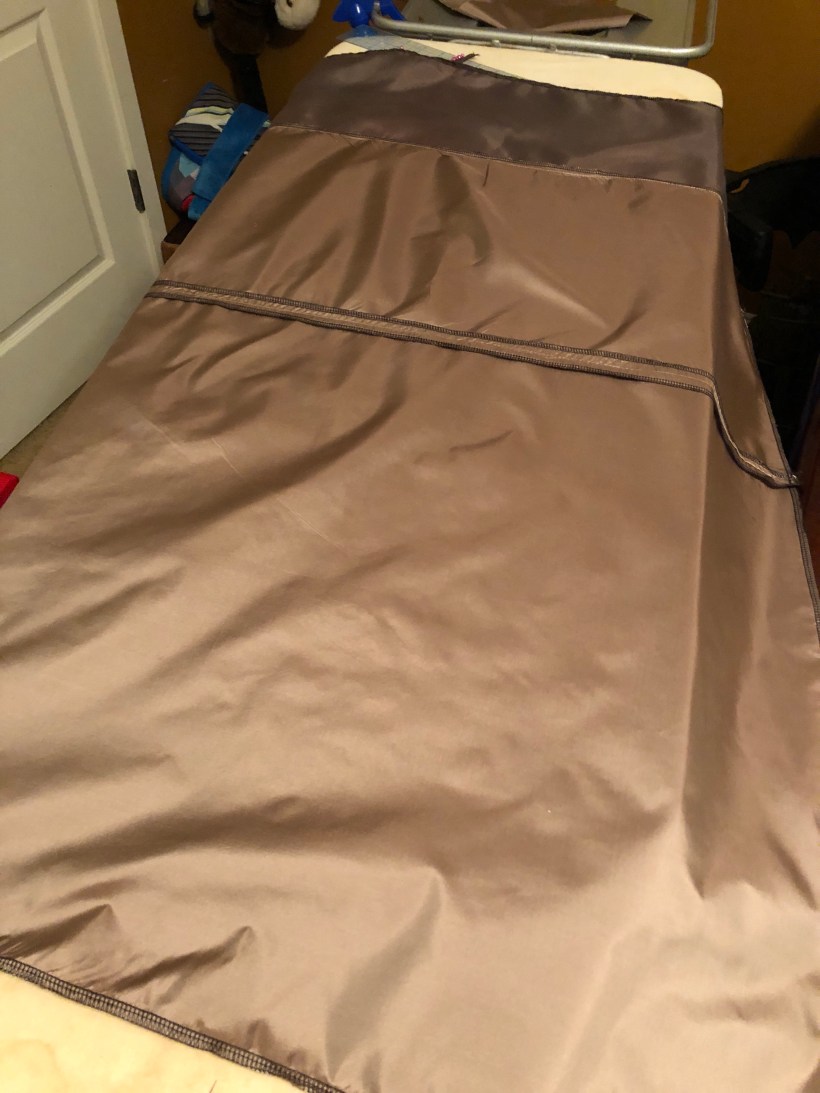
Above, I am piecing together the front panel to one side front panel. Note, I’ve make a 20-inch side panel out of the silk taffeta and the lining material.
3. For the front of the petticoat, embellishing the front prior to piecing together the petticoat is wise as it will simplify the process later
I’ve chosen to add furbelows to the sacque. The process I’m using is this:
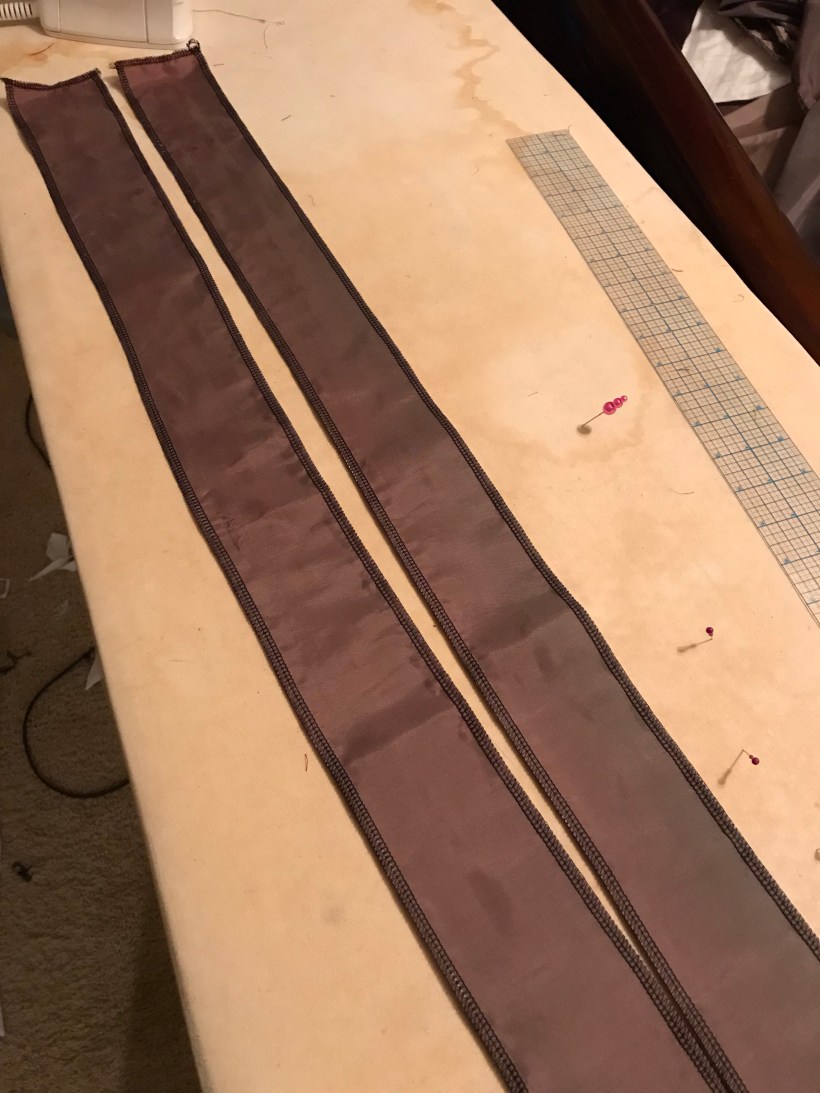
Using 1/4″ elastic ruffled trim, I attach to long rectangular strips of the lining fabric.
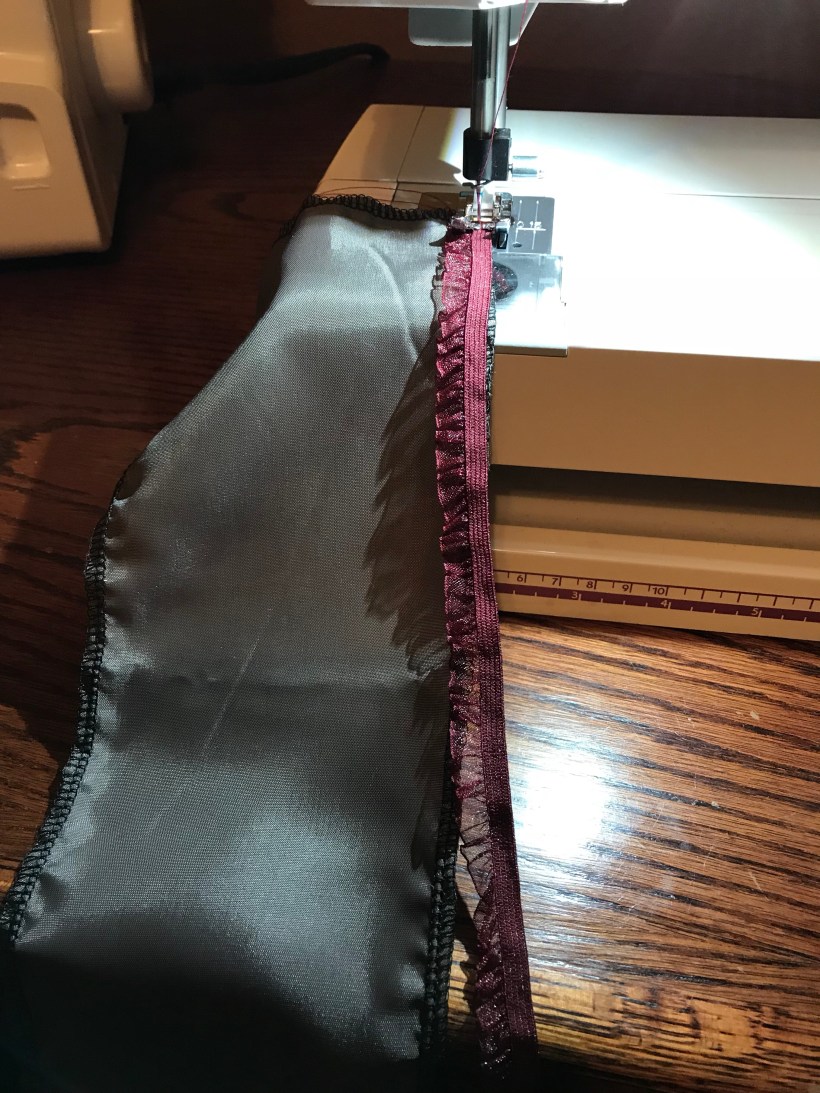
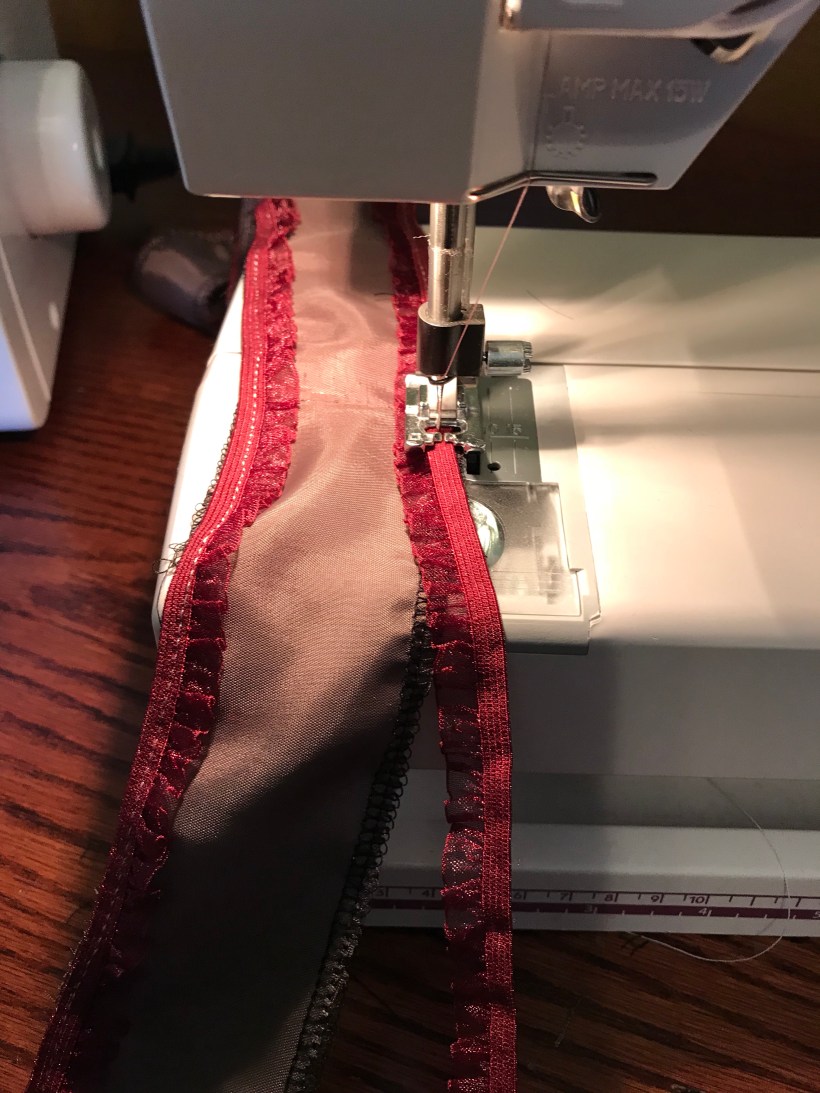
After the trim is attached, turn the trim and narrowware edge over, press if needed.
4. Lay the front panels flat, and lay out the embellishment to the desired location

5. Pin the furbelows and stitch down. I stitched the furbelows onto the panel in the 1/4″ ruffled trim (see below)

6. Fold the panels in half lengthwise
7. Using the waist to floor measurements, subtract the front waist to floor measurement from the side waist to floor measurement and mark this distance on the fold of the front panels

8. Cut diagonally from the mark to the top of the side panels, making a V shape.
9. Do the same for the back panels, subtracting the back waist measurement from the side measurement.
10. Knife pleat both the front and back panels to the waist measurement for your model.

11. Create waist band strips for the front and back panels. I used 45″ length, overlooked an interlining of cotton broadcloth (with a width 2.5-3″)
12. Find the center of the waist band and pin to front center
13. Stitch to the front panel

14. Wrong sides out, stitch the waist band closed and turn out (a chopstick works really well working the waist band right side out)
15. Fold under seam allowance and finish attaching the waist band to the front panel.


16. Do the same for the back panels
17. Bring together the front and back panels, wrong sides out, and stitch the side seams from the bottom to about 10″ from the top of the panels
18. Press seams open and turn out.
19. Try on dress form or model to ensure the waist fits properly. I found that you could make the waist slightly smaller because you can tighten or loosen the waistband at the sides.
To complete, the embellishment for the petticoat, I Used 10 mm round pearls, and pearl and rhinestone findings. Also, I’m going to finish the hem after the sacque is completed. Except for some additional pressing and steaming, which I’ll take care of at the end, I think the petticoat turned out pretty good for having only ever made two! What do you think?

In Part 3, I’ll tackle the bodice and back part of the sacque gown. Stay tuned!
