OK – so it’s been a while since my last post…Timing is critical now. Fêtes is 3 months away! It is time to get very busy! Let’s just say that the holiday season was filled with friends and family. Lots of business travel and also some travel for leisure.
I am pretty sure that I’ve mentioned that the patterns I acquired for Sarah’s and mine costumes are from Reconstructing History. The patterns are pretty good, so far, but the instructions, well let’s just say that they are for people with very advanced sewing skills. That being said, you will need to purchase the “1730s-1760s Fly-front Breeches” pattern for pattern and basic instructions. Notes below will enhance your experience in working with this pattern.
There is nice little introduction about the history of the garments, some comments about extant samples and then the construction details. The writer warns that constructing breeches “is probably the hardest fitting job one has to do.” I would add that breeches are not like the pants that we know in the 21st century. They are very complicated, with many openings and buttons. In researching how to make this garment, I scoured the web and YouTube. I was able to find a few blogs, but the construction details were limited. In fact, construction details for 18th century men’s French clothing is rare to find. I’ve placed the links that I could find at the bottom of this post. Also, there are lots of great pictures of 18th Century Men’s Suits on Pinterest, so check them out too!
So, I’ve decided that I’m going to spend a lot more time detailing the construction details than I might have previously. Along with the writer’s mention of the difficulty in making these pants, they also suggest that the maker uses scraps to fit and make prior to constructing the final pair.
Well – for me, I made 3 pairs in various degrees to get them right!
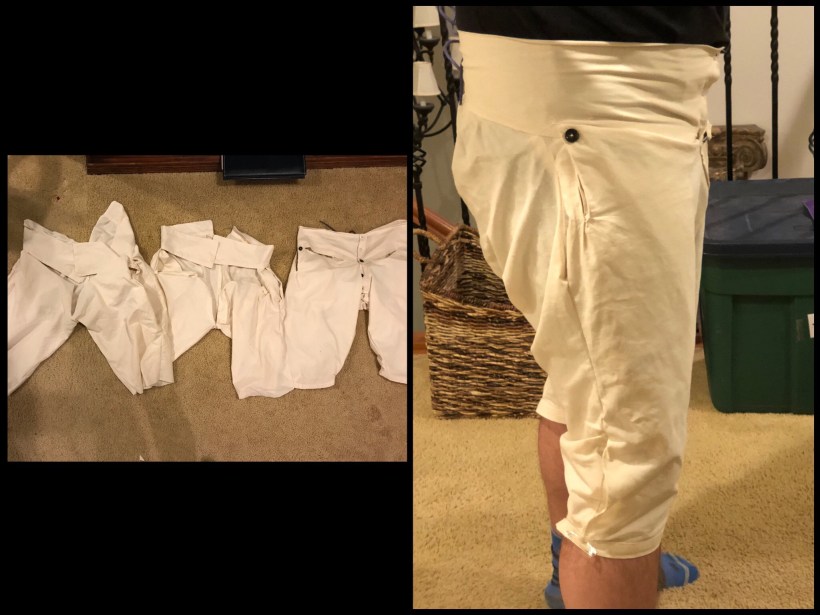
I can’t stress enough how important it is to make a practice pair first for fitting. When researching the breeches, the legs were cut so that they are tight at the knee. I found this pattern to fit loose at the knee and modified the pattern by as much as 2 inches on the leg sides (inner and outer). To make this modification reshape pattern from inner and outer seams.

I’ve got a goal to make 2 different outfits for both Sarah and I. I think I’ve got the time to do it and it will allow me to work out the kinks for the second costumes. I really want to avoid having these look like a home job.
First up, the darker of the two outfits.
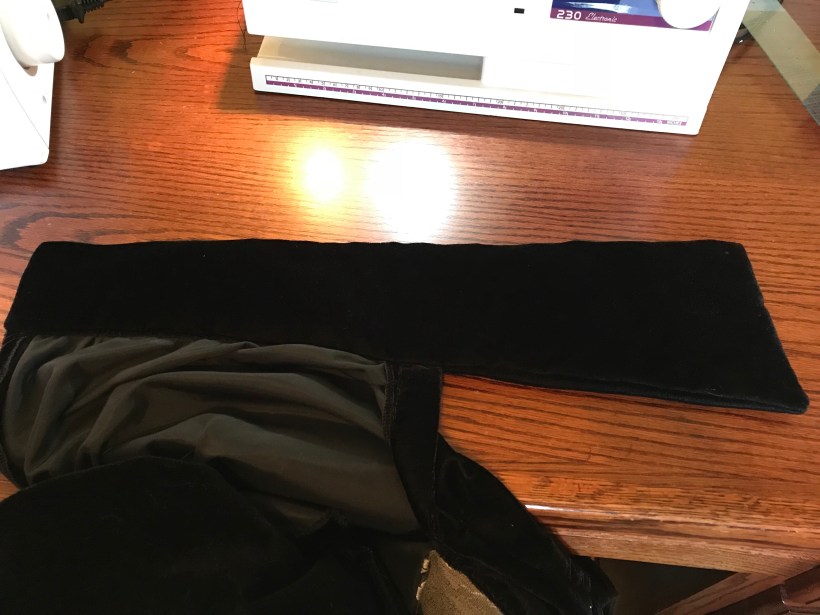
The breeches will be constructed out of black velvet. 2 yards are required.
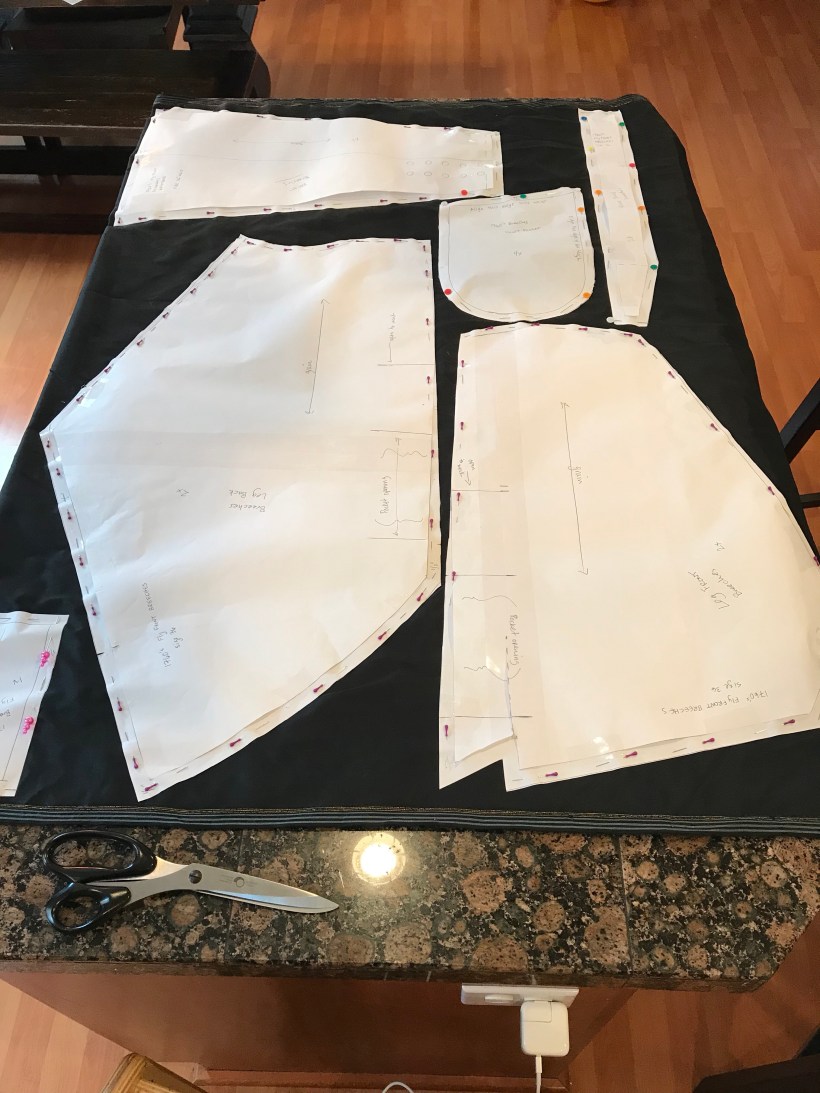
Patterns were traced off the original adding 1/2” seam allowance.
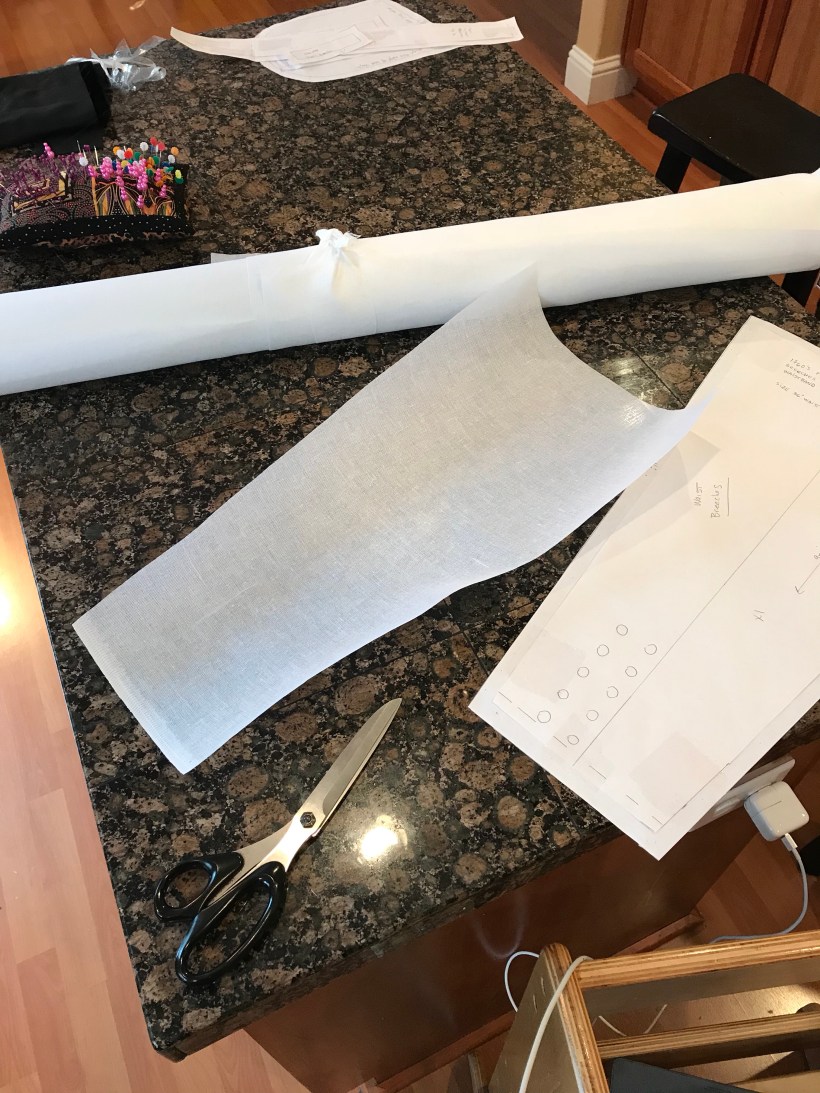
Velvet requires more pinning for both the cutting and the construction because of the pile of the fabric.
Lay patterns out onto fabric, pin and cut.
Since, I’m not interested in historical accuracy, I overlocked all edges of fabric to minimize fraying. Also, these pants are not lined, but if you would like to line them, follow pattern instructions.
For the waistband, remember to cut out interlining or some facing.
Pockets
The pattern calls for 2 side pockets and 2 front pockets (built into the fall front). In making the practice pair, I decided to leave out the side pockets. It adds bulk to the side of the breeches and honestly, isn’t needed. If I wanted to use any pockets in the breeches, the front pockets are adequate. Also, the instructions mention a pocket to be built into the front waist band for a pocket watch. I used a welt pocket construction, which turned out good.
1. On front leg pattern, slash along the dotted line
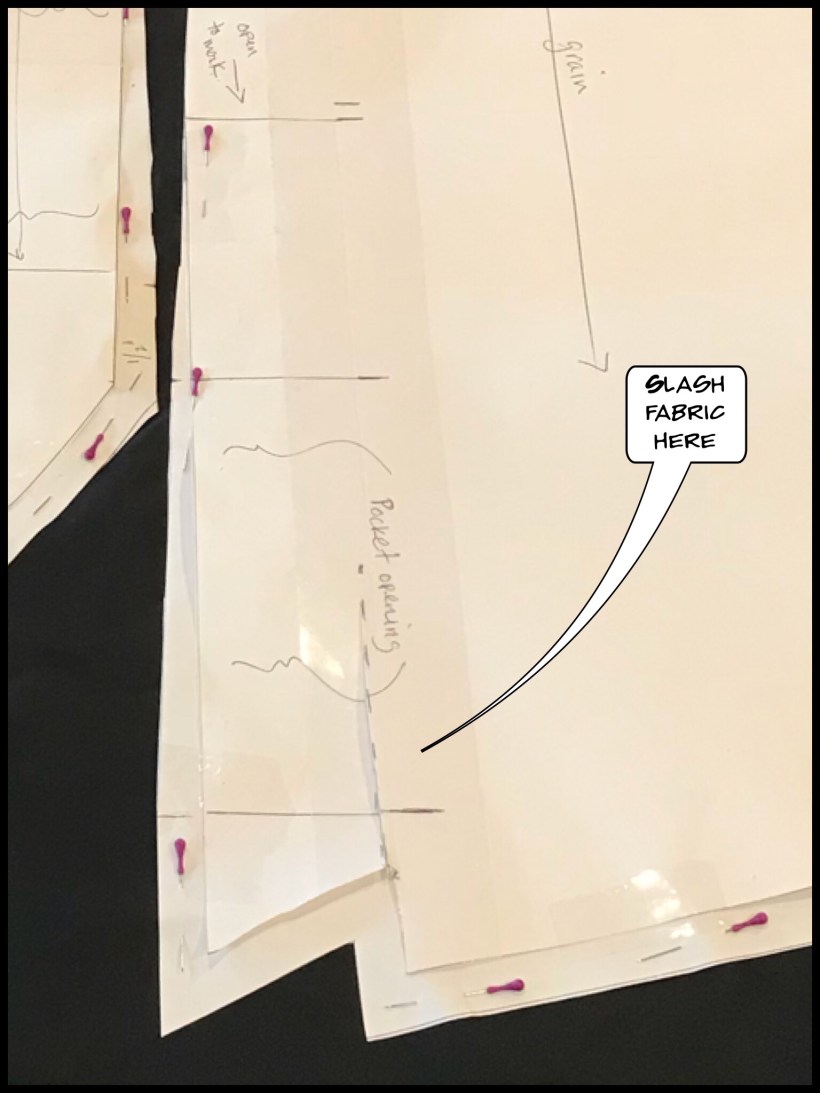
2. Lay front pockets onto the top of the leg fronts, right sides together. Pin the top edges and down the slashed portion of the fall front
3. Stitch along the pinned section

4. If adding side pockets, refer to pattern instructions
5. Lay leg backs right sides together along center seam, pin to mark, leaving gap near waist open and stitch

6. Press seam open
7. Lay leg backs open and place leg fronts on top (rights sides together)
8. Pin from top of of each side to mark (on side of leg) and along the inner seam

9. Stitch along the pinned sections
10. On front legs, ensure the breeches are right side out
11. Sew another front pocket (right side to wrong side) to the attached front pocket. Do this for both sides
12. Fold down top of pocket as desired

13. Sew along the entire open end to the slash
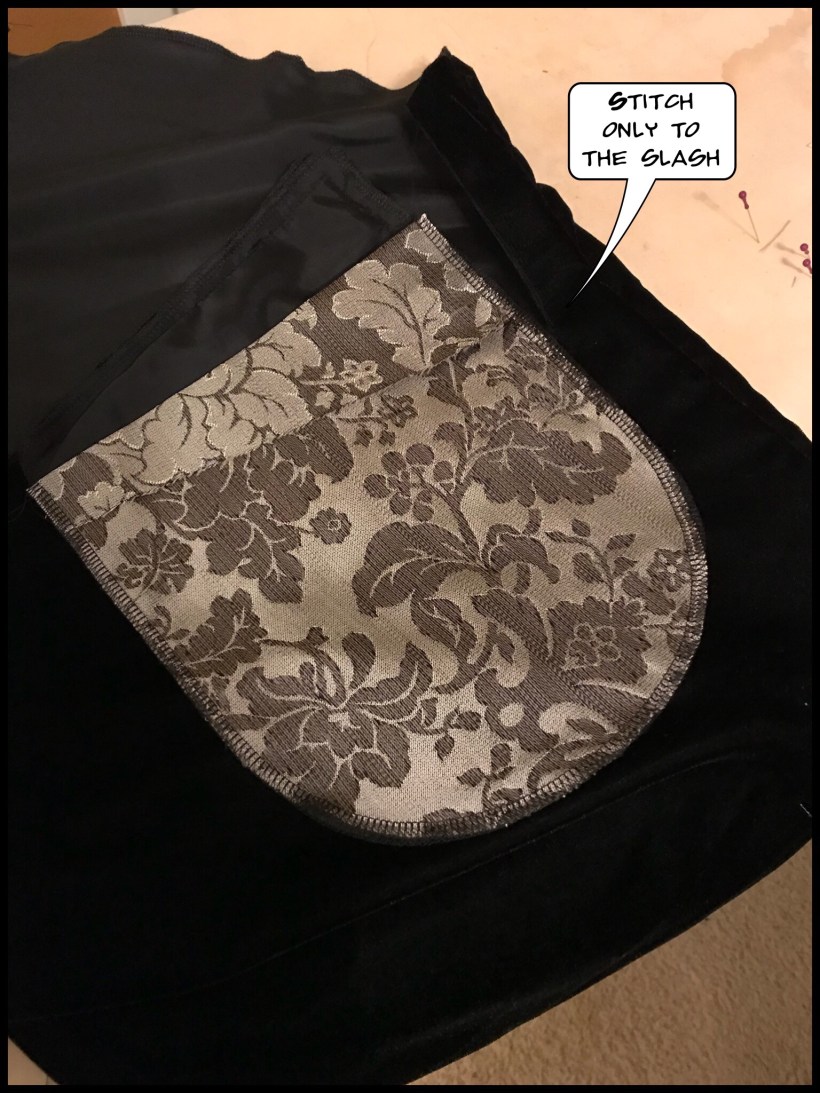
14. Place facing (right sides together) on top of leg front, pin and stitch from top to bottom of slash

15. Do this for both sides
16. Trim the corner of the fall front, turn out the front pocket and then turn out the fall front
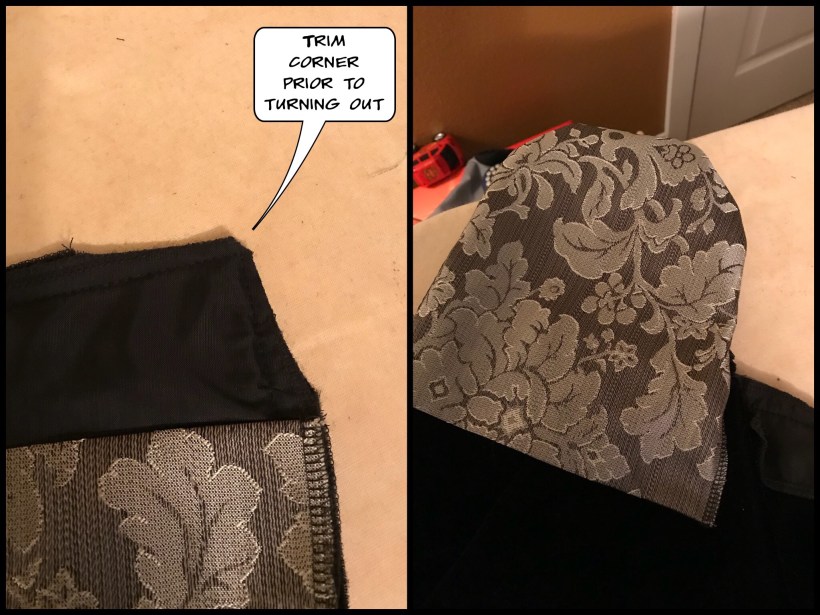
17. Shape corner
18. On the inside of the front pocket, hand stitch the hem to the fall front. This can be stitched by machine, but there will be visible stitching on the fall front
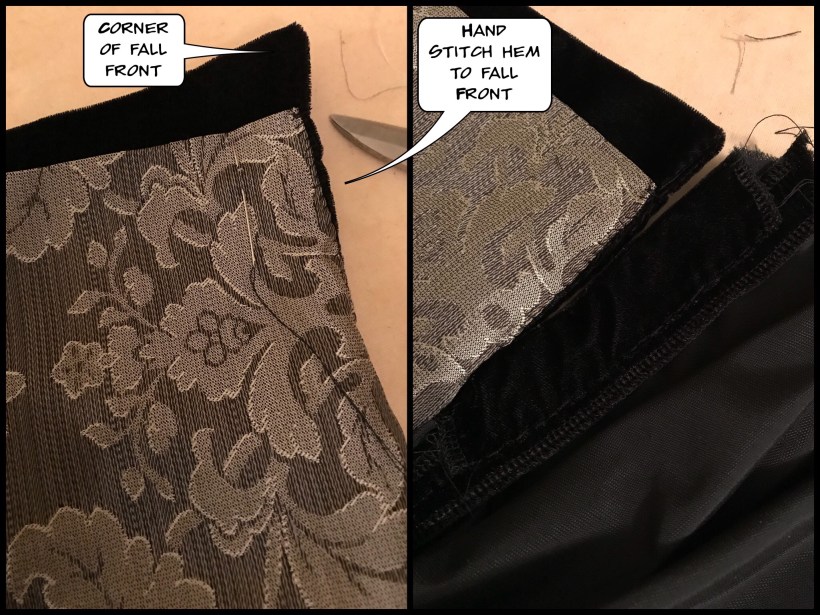
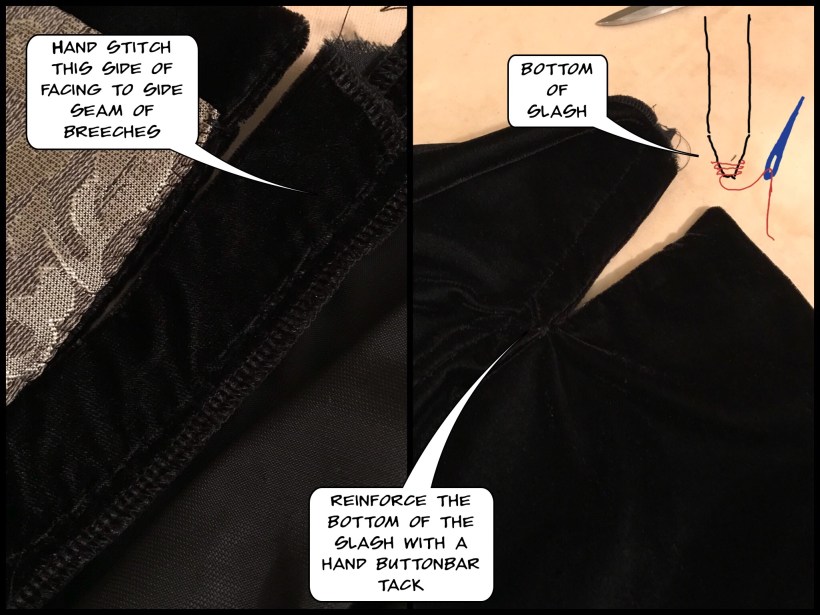
19. Fold out facing and turn under hem on unstitched side. Hand stitch to the side seam of breeches
20. Reinforce the bottom of the slash by hand stitching a buttonbar tack
21. Attach interlining to waistband. I overlocked the edges of the interlining to the waistband for simplicity

22. Fold fly in half lengthwise, right sides together and stitch short ends

23. Turn out fly and trim corners. Place aside
24. Hand baste the top of the back legs about 1/4” from the top from the center seam to the side seam. This basting will be used to gather the back legs prior to joining them to the waistbands
25. Use the basting to gather the back leg fabric and pin to the waistband. NOTE: determining how much of the waistband to pin the back leg may require trying the garment on. I found that laying out the waistband, pinning the short end to the center seam on the back (don’t forget the 1/2” seam allowance on both the center seam on back leg and the waistband) and then wrapping around so that the tall portion of the waistband is centered in the front allowed me to get this measurement right. For me (34-35” waist), it was 10.5”

26. Stitch from back leg center seam to side seam
27. Fold the waistband in half lengthwise (right sides together) and start stitching from the front center. Sew as far as the fabric enfolded inside will allow. Move to the back leg center and do the same (sewing as far as enfolded fabric will allow (maybe about 2-3 inches in)

28. Turn waistband right side out and hand stitch remainder of waistband to the top of the back leg. Do this for both sides

29. If making a pocket in the waistband, follow steps 30 – 41. Otherwise, skip to step 42
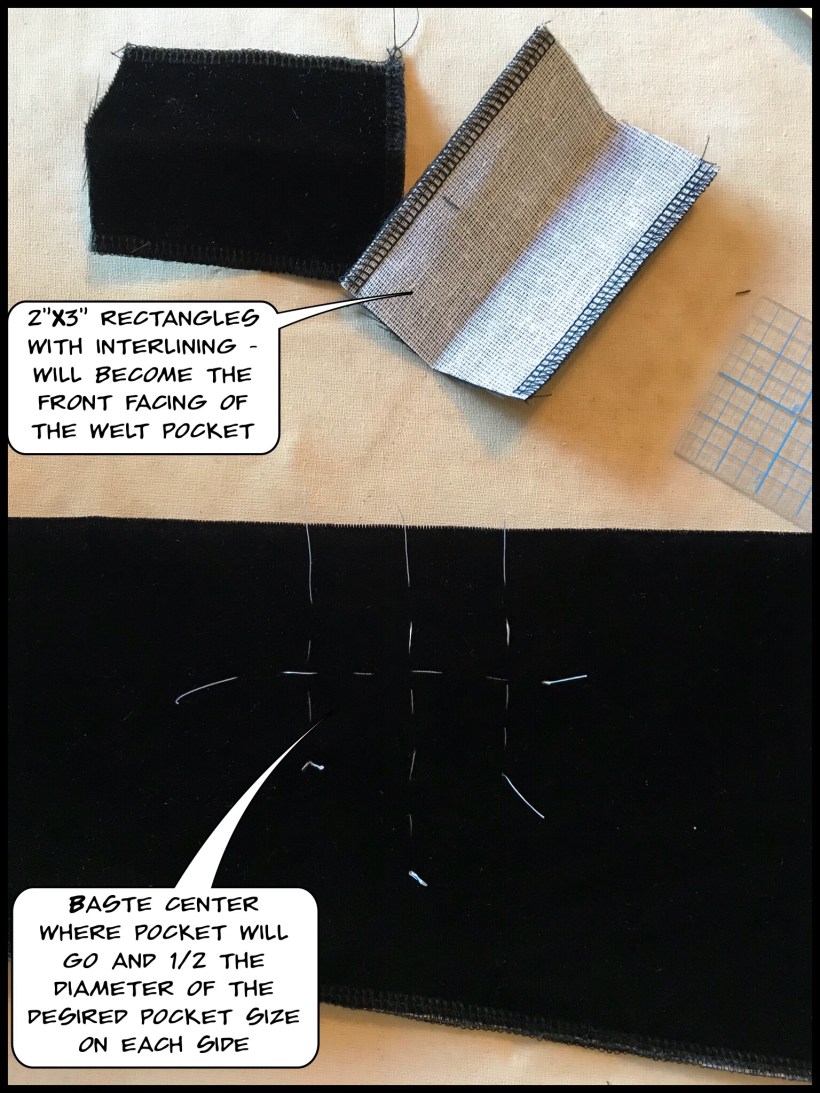
30. This pocket is for a pocket watch that is about 2” in diameter
31. Prepare two rectangles of outer fabric (with interlining attached or add fusible interfacing to back side of rectangle) that is 2” wide X diameter of object (in this case, a pocket watch) + 1” for 1/2” seam allowances. In other words 2” wide X 3” long (see picture in step 33)
32. I chose to place the pocket into the right side of the waistband since I’m right handed.
33. Prior to attaching waistband to breeches, fold waistband in half lengthwise and determine proper location for the pocket. I selected a point that is 8” in from the center front of the waist band and 1 1/2” down from the top of the waistband. Baste location of pocket, but only on the front side where pocket will be
34. Unfold waistband
35. Baste vertically around center of desired pocket location 1/2 of the size of the pocket. In this case, it is 1” from the center on each side (see picture in step 33)
36. Fold two welt rectangles in half lengthwise (press with iron, if necessary) and lay onto the front of the waistband so that each side is equidistant from the center. Stitch in the center of the rectangle from the further basting line to the other side

37. Turn waistband over and carefully cut open down the center of the pocket area and cut to the corners of the stitching line (see picture)

38. Fold welt rectangles through to the inside (see picture above)
39. Stitch the welt rectangles to the small triangles that were formed from cutting the waistband (see picture in step 37)
40. Cut a 3” X 6” rectangle of outter fabric or lining and attach to the top and bottom welt rectangles. Stitch sides of the pocket fabric together to finish pocket. I overlocked the pocket fabric in this construction

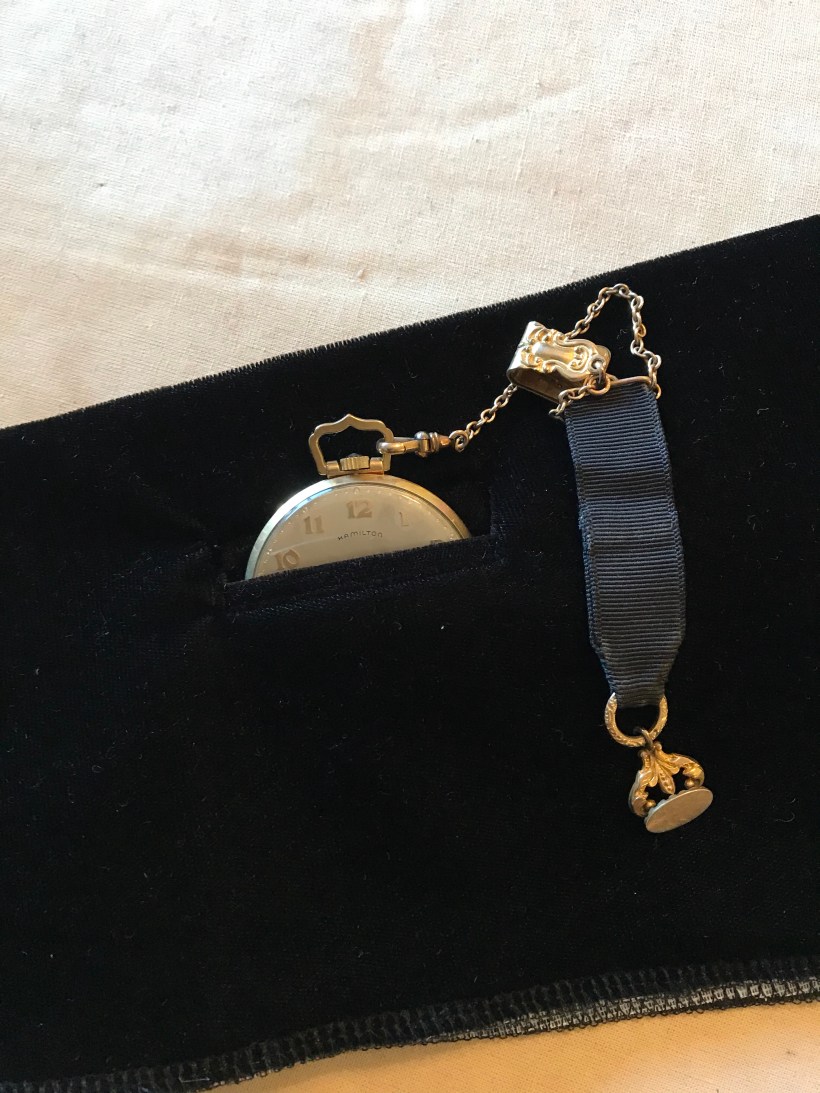
41. Turn over to reveal the pocket. Shape and press with iron as necessary. The picture below reveals the final product. Looking sharp. The pocket watch is my grandfather’s and I picked up the watch chain off of eBay. I’m going to change the ribbon, but you get the gist!
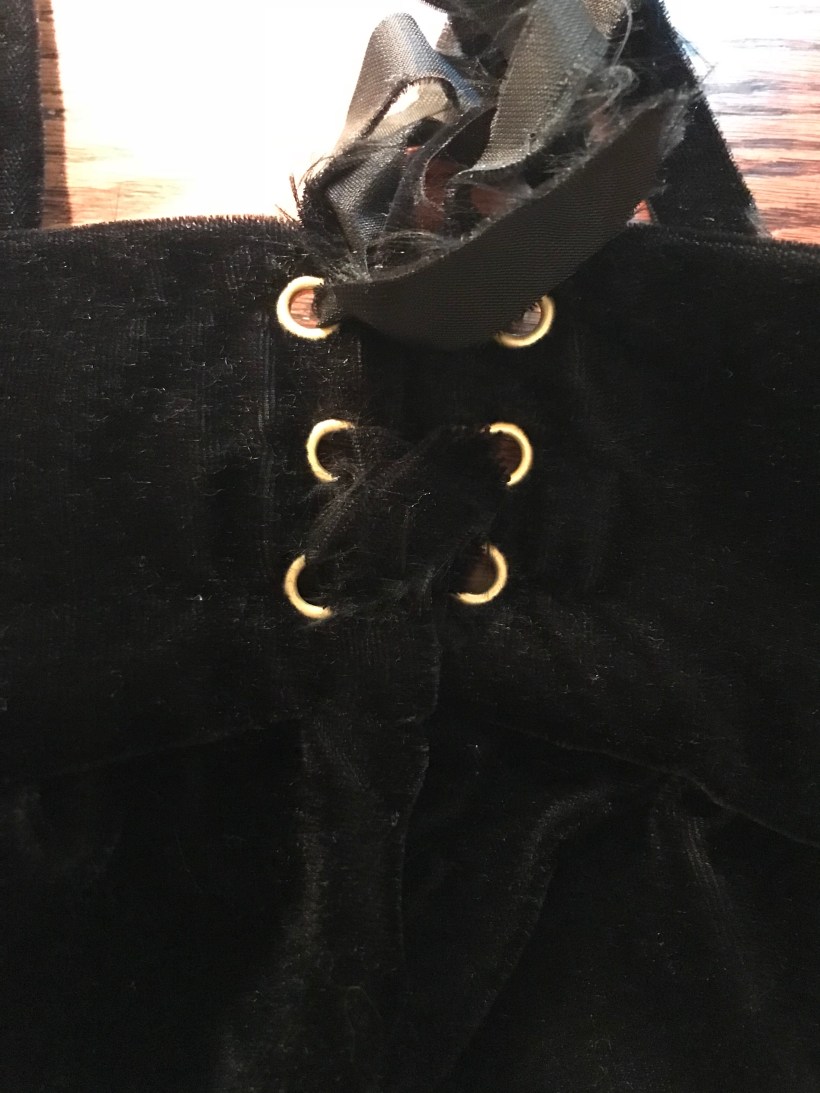
42. The instructions that came along with the pattern indicated that 3 thread eyelets should be made on each side of the waistband in the back. I used metal eyelets. Using the point of a pair of scissors or shippers, poke through the fabric for each eyelet location.
43. Using a small awl or chopstick to expand the opening to the size of the eyelet. Follow instructions on back of eyelet package. If making threaded eyelets, I would research instructions on the web or YouTube
At this point we have come to the end of part 1 in constructing the breeches. All in all, I’ve got about 24 hours into learning how to make this garment. Once I had the know how, I would say it will take about 8 hours or less depending on your skill to make these.
In part 2, we will add the fly, make buttonholes, add the knee bands and finish the breeches.
Until then!
Some potentially helpful links:
1. La Couteriere Parisienne Man’s Suit

I want to pull my hair out when a sewing tutoroal is demonstrated in DARK or PRINTED fabrics. Tutorial means TUTOR or TO TEACH.
Why not use muslin and contrasting thread if your TEACHING?
I really want to make a pair of Fall Front breeches but couldnt follow this at all because for most Historical Sewing I’m a fledgling with no one to help me. Sorry for the bluntness…Im just really frustrated
LikeLike
Well, you’re right. And you can see I did make 3, yes 3 of them in muslin before the black Velvet ones. I guess my blog is only half about teaching and half about the experience. That being said, there were NO instructions I could find to make this garment online or at least that I could find 3 years ago when I started this endeavor. Sorry I’ve frustrated you. Alas, the world is full of disappointment.
LikeLike
I was just noticing also that alot of the images for the other posts where I make the final breeches are missing. I’ll ask WordPress about this…
LikeLike